
Forgotten Memories of Endless Dungeons - a potentially very flawed Icewind Dale no-reload playthrough

Enuhal

Habitué
Messages
199
Forgotten Memories of Endless Dungeons - a potentially very flawed Icewind Dale no-reload playthrough

Hey everyone. Once again I need something to do while listening to podcasts, and since I currently can't find the motivation to start another BG run, I decided to try my hand at a little playthrough of IWD under no-reload rules. I don't have a lot of experience with that game, mostly because I never enjoyed the heavily combat and dungeon-focused gameplay all that much, but for the purposes of sidecontent while listening to other things, I hope that doesn't matter too much, and at least it will be something different.
My experience with IWD mostly consists of playing the demo version (which was quite short) when I was a child and enjoying the music and atmosphere. I have played through the EE once, right when it came out, and never touched it again, and I remember very little of it. I may have done a playthrough of the original game at some point inbetween those experiences (at least I seem to own the CD version), but I honestly can't remember. Also, I don't have any plans to do the expansions. I can specifically remember not liking Trial of the Luremaster very much.

As an additional challenge, I decided that I will never look up any information for this playthrough. No alt-tabbing, no browsing the wiki or any forums, guides etc. - I will just play and see what happens. Since this game is using the BG2:EE engine, this should still leave me with some decent chances (playing on core rules), as I am quite familiar with all the classes, kits and mechanics, and even know a lot of the IWD spells thanks to SCS. However, if there are any instant death traps, fatal dialogue options, huge difficulty spikes, difficult riddles and the like, I may very well get caught off guard.

The party is lead by Ajrina, a totemic druid (scimitars and slings). Our main fighter is a dwarven berserker called Cadrax (I decided to go for dual-wielding flails. I can not remember at all if there are any good flails in the game, so this might be a risky choice, but going for longswords or axes seemed a bit boring for me, and I wanted crushing damage as I, at least, remember facing lots of undead). A fighter/cleric called Angor, another dwarf, using war hammers and slings, will help out on the front line. In the back, Tenobal, as a fighter/thief (being an elf, he uses longbows and longswords) will assist the party, and since I have no idea how the availability of certain spellscrolls will be looking like, I decided to go with a sorcerer as an arcane spellcaster, another elf called Nahema. The last party slot is left open to reduce party management and speed up XP progression - hopefully we won't regret that.

After creating the party, I explored Easthaven, finding a few quests - we killed a wolf, brought a wine bottle to a villager, took down some beetles, returned a broken blade and helped a boy get back his fish from some goblins (Nahma used sleep for that purpose, since there were a ton of goblin archers down there - she starts with sleep and shield). After a rest at the inn, we moved to the broken caravan and cleared out some orcs. I saw an orc shaman (I wonder if these were changed to be actual shamans, as that class didn't exist when the game came out iirc) - I was not quite sure what spell it was casting, but in any case, Angor used command while Ajrina called in a spirit animal:
Icewn000.png
And here I gained my first bit of important information: The hitbox for the spirit lion is huge in IWD:EE! This might make them a lot less useful due to pathing issues and lack of melee space... I will try out other spirit animals in future encounters to see if there's one with a small hitbox. Soon after that we encountered an ogre, hitting it with sunburst and command, casting sleep in the room for the orcs:
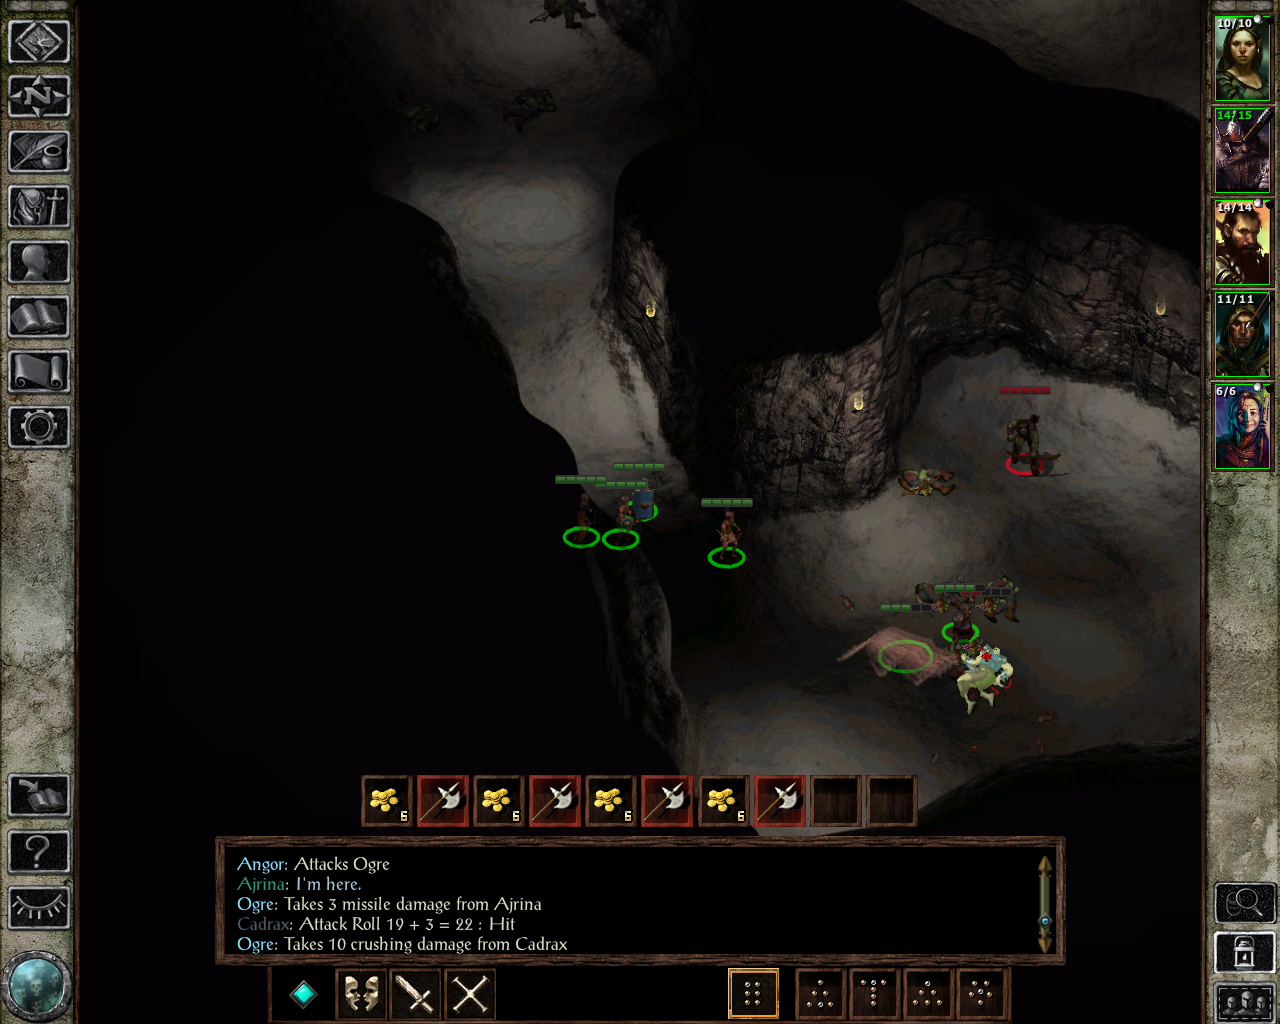
Icewn001.png
Easy enough, so far. We turned in the quest and moved to the avalanche site, getting most party members to level 2. I will propably get to play more on monday.
 

Enuhal

Habitué
Messages
199
Best of luck with you new adventure, Enuhal!

I'm debating whether to read this one. I've never played Icewind Dale, but I feel like if I haven't played it yet I probably never will.

In any case I wish you well.

Cheers!

A.

Thanks! Though this propably won't influence your decision, I won't be writing about the story (though the names of enemies are kind of unavoidable). Also, until I start getting into actual trouble, combat descriptions will propably stay superficial and be mostly focused on differences I'm perceiving compared to the BG saga.

The Avalanche Site, Kuldahar and a first venture into the Vale of Shadows

With my party at the avalanche site, it does feel to me like these goblin archers aren't allowed to deal their full damage by the game (even though I am on core rules), or I am getting very lucky. Whenever I suffer a hit, damage numbers have been very low. I was able to help out an ogre in a tower (I think, from the dialogue, that this was due to my party leader being a druid - I remember this ogre from the demo version, and I think I was never able to do anything with him), explored a valley to the north (very little reward for that) and a mill to the east (which had a surprising amount of sub areas). Here, I tested out my spirit wolf, and I'm happy to report that it does have the regularily sized selection circle, which is good to know.
We moved on to Kuldahar, didn't have the money for any meaningful purchases but got some extra experience from a little sidequest at the inn. I didn't stay for long and moved east to the Vale of Shadows... some yetis and lesser shades weren't too threatening, and I started entering the various crypts around the place. Here I encountered my first couple of traps:
Icewn000.png
However, not knowing trap locations and having skeletons constantly coming at you doesn't exactly help with avoiding every single on of these, and during this initial exploration of the crypts, I did run into two of them, though they only seemed to spawn a few additional minor enemies. A yeti chieftain was easy enough to take down (Ajrina helped out with alicorn lance), but deeper in the vale, we encountered a shadow. Unlike the lesser shadows, this one seemed to be immune to normal weapons, and at this point my only magical gear was unidentified, so I kind of had to hope not to accidentally equip any cursed items. As far as I could guess from the icons, I had a potential mace +1 and longsword +1 plus a couple of +1 arrows. Cadrax took the mace, Tenobal the arrows and sword, and they were able to take down this foe:
Icewn001.png
At that point I was basically out of spells and had to return to town for a quick rest. Nahema also picked up identify as her next sorceror spell, so we finally got to find out what our various magical items did (a RoP and CoP +1 in addition to the aforementioned magical weapons, and some magical, but still bad, armor, which I sold). No flails or morning stars yet, which does not instill me in a lot of confidence regarding my proficiency choices, but I am all in now (having spend the level 3 skill point for Cadrax into those as well). There were two more minor crypts to investigate as I returned, and in one of them I walked into another, more dangerous trap - stinking cloud this time around:
Icewn002.png
Luckily Tenobal was only attacked by this one skeleton, so I decided to take the risk of moving my party close enough to take it down (some got hit by the cloud, but were able to take down the skeleton and wait out the spell). After I was done with the second crypt, I decided to try and rest in there, and, to my surprise, I wasn't interrupted by anything.

So far, none of the combat has been too troubling, with the shadow being the only potential threat, though only due to its normal weapon immunity. Traps worry me a bit more. I am also finding some of the spells I have memorized to be of little impact - sleep, command, hold person and silence all have been somewhat underwhelming compared to their use cases in the BG series so far, mostly due to the types of enemies we are encountering (and also due to the rather fast level progression). If things keep going the way they are going, it seems like group buffs and AoE damage spells might be the way to go here instead. I hope my spirit animals will also be a bit more useful once I get the higher level ones. I did test the spirit bear in one of the crypts, and, like the spirit lion (but unlike the spirit wolf), it has a huge hitbox, so that one won't get much use at all. I hope I remember to test out the serpent next time. Also, Nahema picked up invisibility as her first level 2 spell, a choice made mostly for better scouting and disarming of traps (also a potential defensive spell). We have now entered the final crypt around the area, which seems rather big compared to the others.
 

Enuhal

Habitué
Messages
199
The Big Tomb

Well, I was complaining about some spells not being all that useful. At least in the case of silence, we finally started encountered enemy spellcasters and putting it to good use:
Icewn000.png
The final tomb in the vale is pretty big. I think it was in the second level where we ran into this color spray effect that also spawned a few skeletons around us. I am not sure if it actually was a trap - I was slowly approaching, searching for traps, and didn't get the "trap triggered" announcement. Tenobal, the one searching, was in front and the only one affected, as the others were far enough in the back. Luckily these skeletons are easy to take out:
Icewn001.png
We are starting to encounter more and more enemies that requires us to use magical weapons to hit them - we have a lot of them by now, but still no flail or morning star, so Cadrax still has to destroy his combat stats in order to do something for these encounters. Sunscorch and alicorn lance can at least help out against the more powerful types, such as these mummies:
Icewn002.png
Encounter are getting tougher, so I am using the invisibility spell to send Tenobal out ahead from time to time - this room doesn't look very easy to clear out:
Icewn003.png
As we approach, we soon learn that the skeleton mages in this game love casting stinking cloud (which makes a lot of sense, as their undead allies are immune to the effect) - not good to get caught by that off guard, but we are able to move out of it after a while before taking significant damage:
Icewn004.png

Icewn005.png
Since I don't want to find out what kind of extra surprises this wizard has waiting for us, Cadrax enrages and goes on a solo mission to take it down - which he succeeds in, though tons of new enemies show up, so he nearly dies - it didn't help that he got hit by a lightning bolt on the way up there:
Icewn006.png
Luckily these enemies are kiteable, and as the stinking cloud disappears the others join in to save our berserker:
Icewn007.png
Another surprise group of more powerful skeletons down south nearly takes down Tenobal:
Icewn008.png
We encounter a second group featuring a skeletal mage - knowing now what to expect we are able to move away from and mostly out of the opening stinking cloud, with only Cadrax suffering for a short while before making his saving throw:
Icewn009.png
Luckily these dangerous looking big skeletons weren't actually all that dangerous, and we are able to call in a spirit animal to draw the attention of the enemy spellcaster while we take it down. Having now tested all types, it seems like only the spirit wolf has a small hitbox. I might still use the lion from time to time when space is readily available, though. Through the next door, the invisible Tenobal scouts further ahead:
Icewn010.png
Yes, I remember this - this used to be the end of the demo iirc, and we can deal peacefully with this guy. He wants us to take down an evil priestess. Fine with us - Tenobal tries opening from invisibility with a backstab, which does relatively pitiful damage:
Icewn011.png
However, we are able to hit Lysan with command (somewhat to my surprise), crucially interrupting her spellcasting and giving us the time to take her down:
Icewn012.png
After turning in our quests here and at Kuldahar, we take stock of our inventory. Near the end of the tomb we have found a morning star +1, and Lysan was carrying another one, so we are finally good on magical weapons (everyone else, except for Nahema, has one as well, though we do lack magical ammo which doesn't seem to be readily available in Kuldahar). Nahema has gained another level, picking magic missle and mirror image. Resting in dungeons has been going reasonably well: We had to rest two times in the tomb and were interrupted two times, but by very minor groups of the easiest version of skeletons. We also have enough gold to make some purchases: A bag of holding (which is quite expensive) and a necklace with 5% to our physical resistances, and I also buy some types of potions. Specifically some type of fire substance, because I have a vague memory of encountering trolls relatively early on in this game and not having the ability to actually take them down, and the party has no source of fire damage (I guess Ajrina could memorize flame blade, but that would be truly a last resort). This might be a waste of gold, but they aren't that expensive.

Now I am being sent to some type of forgotten temple ruin. I remember some kind of ice temple in these games, but I am not sure if this is the one. We shall see.
 

Enuhal

Habitué
Messages
199
The Forgotten Temple and Dragon's Eye

Turns out there were no trolls at the temple after all, and I certainly didn't remember this area. To be fair, it isn't the most memorable. I didn't encounter a single named enemy here, and it wasn't very big for an IWD dungeon. However, I did learn quite a few things while being here:
a) I finally noticed how differently a lot of spells seem to act compared to the BG series. I first had an inkling of this when, in the early game, enemies who I had hit with sleep got up immediately after hitting them once, but didn't look into it too much. Now, after quite a few enemy priests here making their saving throw against silence, I checked out that spell and noticed the lack of a saving throw penalty. In fact, there don't seem to be any saving throw adjustments for any type of spell in IWD (as far as I could tell from a quick check in my spellbook).
b) Given the difference in casting animations and sometimes even the lack of a projectile, facing spellcasters offers additional challenges: I generally have no idea what they might be casting and who is the target, plus without having a clear projectile a lot of tactical options are lost (such as spreading out for AoE stuff).
Anyway, during the final fight at the temple (I didn't know it would be the final one, but intended to rest soon, so I had both spirit animals and some buffs going) Cadrax got hit by hold person. He wasn't raging, which, in hindsight, was obviously a mistake:
Icewn000.png
Now I was faced with the challenge of keeping him alive. The smart thing to do would have been to cast invisiblity on him and just fight with four party members, but I didn't think of that at the moment, instead I just tried to distract our enemies, even putting unsuitable characters in melee combat in the hopes of the verbeegs not attacking Cadrax. This did work, but it was a very close affair - a lot closer than it needed to be:
Icewn001.png

Icewn002.png
In the end, we did get enough money here to afford the robe sold by Orrick for Nahema, which is certainly nice. Now we got send to Dragon's Eye - this is a place I do remember, vaguely. I remember two things: a) it's huge, b) the boss at the end is pretty damn dangerous.

Well, we finally meet the trolls I had though about earlier - outside. And they don't need fire damage to die at all, for some reason. Inside, we face a ton of lizardmen, including shamans. And wouldn't you believe it, they have hold person as well. With our limited tools to prevent ourselves from getting hit by that, there might be a fair amount of random chance to this part of the run. Also, facing quite a lot of bombardeer beetles can be quite annoying as well, due to their chance to stun with their cloud effect:
Icewn003.png
Cadrax should really only every melee them if he has rage up, to be honest. I will mostly try to kite them in the future. There are spiders as well, but the game gives you a huge stack of antidotes.

Well, to the north-east of the first level we meet the leader of the lizardmen, and the numbers do look pretty overwhelming, so we retreat at first:
Icewn004.png
Once we're deeper into the tunnels and the enemy is a bit more spread out, we use enrage on Cadrax to deal with the potential hold person spam while calling in a spirit lion and shooting down the lizardmen - this works out surprisingly well, though Angor does get held during the battle:
Icewn005.png

Icewn006.png
We move on to the second level, and here we finally do meet our trolls, and this ones do actually need fire to take them down - though we have found quite a bit of flaming oils and even some fire/acid arrows at this point:
Icewn007.png
From time to time I turn Tenobal invisible and send him on a big scouting trip - 4 talonite priests and a bunch of trolls. Seems a bit dangerous:
Icewn008.png
At least we are warned and can fully buff up, get in our summons and use our new spells such as static charge - once again Angor gets held, but at this point Nahema has her first 3rd level spell (haste) and we emerge victorious:
Icewn009.png

Icewn010.png
Thankfully we can now rest here, without interruptions, thanks to a priestess we have rescued. I did rest earlier on around the area once, and was interrupted around 6 times before the rest was successful.
The next level turns out to be full of undead instead of lizardmen or trolls. Being happy with the invisible scouting approach, I send Tenobal in once again and can actually explore the entire level and disarm all the (very many!) traps before the party has to do anything. Yeah, this might be a battle we need to buff for when we get there:
Icewn011.png
We soon learn how the various types of undead here function (hit the blasting skeletons at range and stay away), and soon find ourselves at the room shown in the screenshot, where Presio, the resident Necromancer, seems to live. With bless, prayer, remove fear, DUHM, two spirit animals and haste (which does affect spirit animals in IWD, so it might not get stopped by free action, as they are supposed to have freedom of movement), we have a pretty strong fighting force, and Presio joins the fight late, meaning that she's mostly isolated and only manages to hurt Nahema before being taken down:
Icewn012.png

Icewn013.png
More of Dragon's Eye soon to follow.
 

Enuhal

Habitué
Messages
199
Dragon's Eye continued

The next level was very odd: I initially met two friendly NPCs who immediately turned hostile when Tenobal opened a locked door near the entrance, and suddenly tons of enemies from throughout the level approached the party. I retreated. One of those two hit us with a slow spell, and I was barely able to make it to the exit:
Icewn014.png
However, the area transition didn't bring me any safety - the enemies followed to the next level. I had no choice but to cast haste to at least counter slow and call in spirit animals, while casting prayer. Two more times I used the area transition to get a tiny amount of breathing space. Soon after slow ran out, haste ran out as well, and I re-hasted to finish the fight (while already fatigued):
Icewn015.png
After resting, we further explored the now pretty empty area, only encountering a few enemies, such as this guy, who managed to hold Ajrina - but this time I remembered the use of invisbility to save a held party member:
Icewn016.png
Also, I got a pretty strong +3 staff from here, with 15 charges offering a choice of three different spells, including invisible stalker. I've also picked up charge-based blur cards and a deck providing a random buff each time. Well, we make it to what turns out to be the final level, where there are tons of yuan-ti behind every door (a lot of them dangerous archers), and quite a few traps. This room full of archer elites was especially deadly - when Cadrax first entered he soon had to flee again due to the sheer amount of missle damage he was taking:
Icewn018.png
I tried to send in Angor instead, who is using a large shield and even has weapon and shield style, but even he got hit a ton - retreating, barely, with his life with a single hit point left. It was up to summons and the other party members to finish the fight:
Icewn019.png
We got a nice longbow with an additional APR from that one, and returned to the previous level to rest (there's a group of adventurers that we rescued there, watching over our sleep). Here's an example of traps and ranged enemies making it really tricky to find a good position for combat:
Icewn020.png
A feigned retreat would have been the ideal choice, as you can imagine.

Okay, so Tenobal goes for his usual invisble scouting as he approaches what is quite clearly the final room in the dungeon, disarming some traps on the way - this little girl will transform into the boss and is surrounded by a bunch of yuan-ti, though not too many:
Icewn021.png
By now we have Stoneskin and Ironskins as well, protecting our spellcasters (though Ajrina didn't memorize Ironskin for this battle). We call in the spirit animals and a nymph, buff with Prayer, Recitation, PfE 10' Radius, Remove Fear, Bless, DUHM, Rage, MI/Blur, and some of our item-based buffs. Ajrina calls in insect plague, which, as it turns out, works more like a cloud effect in IWD, which isn't nearly as useful compared to its BG counterpart:
Icewn022.png
We are able to take down the various yuan it, but struggle to deal damage to Yxumonei, who is not only hard to hit but also apparently highly resistant to magic. She deals so much damage in melee combat that both of our primary fronliners soon have to resort to kiting, and Nahema uses her staff charges to call in invisible stalkers. She herself now serves as the tank, with Stoneskin, MI and Blur buying us some time - she even gets in an amazing hit with her staff for 18 damage!
Icewn023.png
It doesn't help that haste has run out by now, but the two invisible stalkers are able to finish the battle for us before Nahema's defenses crumble:
Icewn024.png
That is a nice amount of experience points. Well, we loot the area and rest on the way out, which turns out to be a good idea, as Kuldahar is under attack when we return, though the monsters are easy to kill. We sell everything we don't need and are able to afford a morning star +3 with a nice healing/+strength proc chance, and a flail +3, and even a +2 scimitar with a luck effect. I am still not too happy about the fact that only normal ammo is available here. Also, a quick update on Nahema's full spell list, as she's gotten another level:

Level 1: Shield, Sleep, Identify, Magic MIssle, Chromatic Orb (which I picked after I noticed the lack of saving throw adjustments)
Level 2: Invisibility, MI, Blur, Acid Arrow
Level 3: Haste, Fireball, MMM
Level 4: Stoneskin, Emotion: Hope

Ajrina is now at level 10, so we have the highest level of spirit animals available. Given that they can be hasted in this game, they might be quite powerful, but we shall see... so far they have proven to be useful but not nearly as overwhelmingly strong as they are in the BG1 mid/lategame and early SoA.
 

Enuhal

Habitué
Messages
199
The Severed Hand

After several very close calls in Dragon's Eye, the next big area, the Severed Hand, was a step down in difficulty. That is, the enemies didn't get any more powerful, but I certainly did. Also, as soon as we reached the fourth level of the tower resting was fairly freely available, which allowed us to fight with buffs for most of the later part of the area - a pretty damn big advantage. The lack of a real boss fight was a bit surprising.

These goblin archers early on did in fact do a ton of damage and seemed to have great thac0, but they also had very low health - finally a good opportunity for Nahema to use her fireball spell:
Icewn000.png
Notice that we have some minor potion buffs active (strength on Ajrina, giant strength and heroism on Cadrax) - my potion stocks are starting to get bigger, so I am starting to use some of the types that I have in abundance for slight boosts so we don't end the game with a completely filled but unused potion bag. Also, later on I found a potion here with a permanent dex +1 and str -1. Since Ajrina's strength bonus doesn't change between 11 and 10, I decided to have her drink it for the additional ranged thac0.
I soon realized that these burning skeletons would just constantly cast fireballs at me, so I had to aggressively go after them:
Icewn001.png
Also, it seems like Tenobal has some type of 3rd edition evasion ability as a thief? Look at him taking zero damage from fireballs:
Icewn002.png
I didn't pick this for him, so he must have gotten it automatically without me noticing. I can't find it anywhere in his character screen, and due to my rules for this run I can't look it up. I wonder if anyone else has some hidden abilities I don't know about.

There were surprisingly few traps in this place (as a result I spent a ton of time looking for traps that weren't there) - one tiny one that I still managed to run into was near this elevator - luckily we had already cleared out the area:
Icewn003.png
That's it already in terms of screenshots that I took. The four towers at the side were quite easy to clear out because I knew I just had to venture downstairs a bit in order to rest, so I was often fighting with a decent amount of buffs and called in spirit wolves if needed. There was another hold person situation once, but it wasn't all that dangerous in total. I got all machine parts to the elven leader and returned to Kuldahar, where I gave Orrick a book on mythal lore. Seems like he has some new items in stock now? I was able to buy two wands from him that might be useful, the other stuff wasn't all that interesting for my party (was thinking about a hood for thieves with +2 ac, but giving up protection from critical hits seemed like a bad idea). From the smithy, I got the +3 hammer for Angor and the sling vs giants, just in case we're going to meet some. Unless there's a merchant stock update, the only even semi-useful thing we could still buy is a +3 longsword for 40k (which is very expensive for its lacking abilities), and some potions.
Also, Nahema has picked up breach. No idea if we will even need it, but I figured we will run into some kind of spellcaster with physical protections at one point in the game, no? So far we've only seen pretty much one with any kind of pre-buff, but that was only against spellcasting (Presio, iirc).
 

Enuhal

Habitué
Messages
199
Dorn's Deep

So, after entering Dorn's Deep, I found the first area to be very easy to clear out - some myconids, some ettins. These myconids use a saving throw vs death for their spore attack, which Cadrax already has down to 1, so he really did a great job baiting out these attacks. Some caves with orcs or orogs were easy enough to clear out, and we found a little path to the north-east where we did complete a quest for an unfriendly mage, gaining us some extra experience. Level ups are getting a bit scarce now compared to earlier on. The next big area did involve some type of drow ambush, which I noticed early thanks to Tenobal once again being an invisible scout. We had to deal with stoneskinned fighter/mage multiclasses (or at least that's what I would assume they were), some guys with crossbows, and sorcerers, who used this fire damage/berserk spell whose name I can't recall. It's part of the IWD spells via SCS, but I never ever use it and I can't recall ever getting hit by it in the BG saga. Or maybe once? I seem to remember using Exaltation once on my Priest of Tyr to get rid of a berserk effect, maybe that was it?

Well, I kind of forgot about using potions again, but over all the fighting in this area wasn't too tough, especially because the IWD AI isn't all that good at calling for help or following characters they can't see anymore. For two groups of drow spellcasters on both sides, I was able to trigger some of their buffs (mostly mirror images), retreat, and explore another part of the area just to return once their mirror images were gone. After the fighting was done, I found myself in some type of puzzle room full of various different symbols.

I was honestly completely lost here at first, and this turned out to be the biggest challenge since the final two levels of Dragon's Eye for me. While I do fairly well with literary riddles, I am not very good at visual puzzles at all, and I often end up looking up the solutions for them, but this was not allowed within the rules of this run. Sadly, I had no memory of this room at all from my previous IWD experience. First thing I noticed: Stepping upon any of these symbols (presumably only the incorrect ones) triggers a lightning bolt, even the smaller ones closer to the center - and as lightning bolts like to do, these bounce all over the room, even to the party trying to hide safely near the entrance. On most of the symbols, I just heard a loud click, but on one of them I got a different message - too bad I was moving around kind of randomly and these messages are slightly delayed, so I didn't realize which symbol actually got me that different message:
Icewn000.png
Obviously, I knew there had to be a clue somewhere on what to do, but I looked at all the visuals in the room and just found nothing that would help me in figuring out which symbols to press. I thought about pressing the ones in front of the dwarven statues, but the one in the top left, for example, isn't really centered on one of the symbols. Well, after some more experimenting everyone got really low on hitpoints:
Icewn001.png
One hitpoint on Tenobal, and he is trapped in the center of the room, where he can't get out without triggering a symbol. I tried moving the party closer to him for an attempt at resting, but resting is not allowed in the area. I thought about my options and decided to throw him one of my 3 potions of absorption, which should allow him to run out - I just had to hope that the one lighting bolt he would inevitably trigger wouldn't bounce towards the party...
And of course it did. It actually jumped there really quickly and straight up killed Nahema:
Icewn002.png
Angor can't cast 5th level cleric spells yet, so we can't raise her on our own. I wasn't too happy with the thought of having to go back to Kuldahar for a resurrection. First, though, I wanted to get revenge on this annoying puzzle. Well, first I should mention that this is a room that the entire party has to enter (I already tried having four party members leave, with the thought of using an absorption potion on the final one to solve the puzzle via experimentation - maybe I should have tried kicking out party members - what happens to kicked out party members in IWD, do they just stay where they are?). However, with us being down to 4, Ajrina could buff everyone with protection from lightning (as she has exactly 4 level 4 spellslots - clerics don't seem to get that spell in IWD). So, I left the room, rested (luckily no ambush) and returned, now with immunity to lightning damage for a while. Time to randomly activate symbols, I guess. Without any visual indicator and only the text message, it took some time to figure out which symbol had triggered the different reaction, but I eventually figured it out - the hammer and anvil to the upper right:
Icewn003.png
However, running randomly towards other symbols didn't seem to get any notable results after that. I was getting worried that protection from lighting might run out, so I left the room again to rebuff the party.

This is when I noticed that, directly outside of the puzzle room, there's a huge table with 3 different symbols prominently featured on it... the hammer and anvil on the outside, and two other symbols closer to the inside. And yes, this did feel incredibly obvious in hindsight (like most puzzles do). Armed with this new information, I decided that I would have to propably press these other two symbols after the hammer and anvil - I rested and rebuffed PfL anyway just for safety - and here we go, it worked:
Icewn004.png
That was a bit of a rough one - my first character death in IWD was too a puzzle, not to combat. Not something I would've predicted.

Well, I decided to check just a bit further ahead, because by now I had noticed that IWD tends to place at least some type of healer, shop, resting option etc. at later points into its dungeons, and maybe we would run into something like this in the very next area. I really didn't fancy the idea of going all the way back to Kuldahar. And, incredibly, the very next NPC we met was a friendly ghost who happens to offer healing services, including resurrection - . It was incredibly costly (I think around 7k-9k gold), but we really didn't have much of a choice. We were also warned of a lich ahead, though an unusually weak one, according to the ghost. That turned out to be an understatement: Once again, first Tenobal scouted the area and disarmed traps, we cleared out a bunch of super easy skeletons, and eventually we did find a lich (who was able to see through invisibility). I was a bit scared to approach it, but since there was no other way forward, I buffed up and attacked. The lich did almost nothing and died very quickly (some animate dead spells, and horror - I have always have remove fear ready, and I finally got to use it!).

Well, the lich was not quite dead, to be honest. The dialogue already suggested this - this lich respawned while we were looting the nearby tombs, and we had to find and destroy its phylactery further ahead. In the next room, we found a ton of really good loot, including an amazing helm with +2 AC (by now we had also fought a unique +3 longsword, which made our final planned Kuldhar purchase pretty much obsolete). A greater mummy was actually a significant threat, because she hit much of the party with some kind of symbol spell with ended up disabling three of our five characters - however, Cadrax and Tenobal remained free, and Cadrax is quite a good fighter by now, with grandmastery in flails - he was basically able to kill the greater mummy by himself.
Further into the chamber we encountered the lich again - how did he get here? we just left his respawned version behind in the previous room. Well, we did find the phylactery, as I had Tenobal loot more tombs while the others were busy fighting. We were supposed to place the phylactery into a specific tomb, which we did, but nothing really happened. We killed the lich, and it respawned again. We returned to the previous area, killed the lich (who seems to almost exist in two locations at once) there again, nothing happened. Moved ahead again, killed it again, nothing. After that I returned to the spirit to check out the exact dialogue again. It wasn't extremely illuminating, but gave me the idea that, maybe, the lich had to be closer to its phylactery upon death, so I tried luring him closer to this tomb. I am not sure this is actually the reason why it finally permanently died this time around, but it did (I also removed and re-enterd the phylactery into the tomb multiple times during this entire ordeal, this could also have been an influence on the confusing events).

Anyway, I took no screenshots of this entire situation as the actual fighting was quite easy and didn't feel very notable (except for the greater mummy, but it seems like I forgot to take one there). Once again, the puzzle element was actually the tricky thing.
Well, apparently we're out of Dorn's Deep now and are entering a new chapter and some type of ice area. I saved and quit, but I first had to deal with an initial ice/snow troll ambush. Once again we have a need for sources of fire damage, but we're a bit better equipped for that now (with our sorcerer having MMM, amongst other things).
 

Enuhal

Habitué
Messages
199
Wyrm's Tooth

Well, in some way this turned out to be an incredibly short chapter: I walked across the frozen area, killed a few trolls, decided not to go into a big building that the map referred to as a museum just yet and instead went to a path north-east, in another cave there (leading to a lower part of Dorn's Deep), and the chapter ended. Well... I didn't want to skip out on the potential experience and equipment we might find at the museum, so we immediately returned - though it was nice to see that there was also a path to the world map near the cave entrance.

Surprisingly we didn't have to fight pretty much anything for most of our stay at the museum, talking to some frost salamanders, and even convincing their leader to hand over a key to free their slaves, which we did without any violent incidents. However, upon us leaving after that, we did run into a troll & salamander ambush:
Icewn000.png
And when we returned to the hidden leader of the slave rebellion, all salamanders on the way had turned hostile - well, we took that opportunity to wipe out the whole lot. While their passive frost damage was somewhat annoying and required us to use some healing spells, the fighting over all wasn't difficult at all. During out talks with the slaves, one of them also gave us a manual to fix a nearby broken bridge, and it turned out that there was another cave beyond that bridge. After taking down more trolls, we stumbled across a spellcaster with a bunch of black ice knights at her side - another servant of Auril. Cadrax immediately attacked her, and her distinct lack of prebuffs allowed him to take her down pretty much immediately:
Icewn001.png
In another part of the caves to the west, we encounterd some frost giants, who were also keeping slaves. To free these, we destroyed some wyrmlings and killed a guard:
Icewn002.png
I was also able to talk the frost giant leader into giving me some kind of badge. I have a vague memory of gathering a bunch of these badges from various bosses in the later parts of the game, but I am not quite sure of their purpose. In the end, I decided to attack the giants anyway for the extra experience - they're clearly quite evil, and I wanted to get some value out of buying the giantslayer sling earlier on in the game. The battles weren't all that difficult. I had also found some pure water earlier, so we returned to the Severed Hand to hand that to the gardener, also taking the opportunity to sell a bunch of stuff to the merchant ghost. I bought his supply of acid and fire arrows, and noticed that he had infinite +2 bullets on sale, so I bought a whole lot of them, hopefully enough for the rest of the game. Sadly, still no magical arrows in large supply.

It seems like we're going further into Dorn's Deep next. I should mention that Nahema has leveled up and picked up a few new spells, most importantly Emotion: Courage and Spell Immunity (though that seems a bit less useful with me not knowing any spellcaster scripts or spell animations here - still, a preventative SI:A against high level spellcasters always seems like a good precaution). Angor also can finally cast 5th level cleric spells. He's picked up Chaotic Commands for now, but this also means that we can now raise future dead party members if needed. On another note, while our spirit wolves aren't exactly overwhelmingingly powerful in combat, they are getting a whole lot of paralyze hits, which is quite useful against enemies that are low in numbers but high in hitpoints such as the frost giants.
 

Enuhal

Habitué
Messages
199
Further down in Dorn's Deep

All right! We go underground once again, and fight some kind of invincible suit of armor, some salamanders, ettins, and other constructs. To the north-east we seem to be taking huge amounts of damage out of nowhere from basically invisible enemies - This prompts me to remember that invisible scouting has worked out well in the past, and, approaching from the other side, I realize that this is due to a bunch of archers inside of a tower that we can't target from the outside. Luckily I just found a ring doubling both first and second level spellslots for my sorcerer, so even without invisibility 10' radius, we can turn the entire party invisible:
Icewn000.png
Once we're inside, the archers are much easier to deal with, and we get a fair amount of experience for that. We meet a few deep gnomes asking us for help - one group wants food (which we don't have), the other to be freed from a salamander leader - that part we can do, it's easy enough. Further into the mines we encounter a bunch of elementals which are fairly easy to take down, as they approach us in a nice line of enemies and not in a huge group. To the south, there are fire giants, which are initially neutral, but I decide to attack immediately this time around, thinking that I will propably kill them later on anyway. They are lead by a fighter called Maiden Ilmadia who is actually incredibly dangerous, as she seems to be perma-hasted and does huge amounts of melee damage - by far the strongest physical fighter we've faced so far. Cadrax, who is hasted as well due to boots of speed, soon has to run and we kite her around while trying to take her down at range:
Icewn001.png

Icewn002.png
That was a bit surprising - but it's good to see that there's still challenging combat awaiting us here, after the last few areas have been a bit easy to clear out!
Well, this nets us another badge, and we enter a temple full of undead. Seeing a few imprisoned/corrupted priests of ilmater, however, triggers a memory for me. I remember this room, and I remember that there's an idol we can destroy, which should in turn destroy all the undead.

Now, it wouldn't be hard to clear out the undead ourselves, step by step. This would be the smart play - safe, more experience etc. - and there's nothing here we haven't faced before, it would've not been all that difficult. However, I decide that an enraged berserker is kind of unstoppable, so why not send Cadrax on a solo mission against the idol? Well, I'll tell you why... when I said this room is full of undead, I meant it. Dozens of enemies start attacking him soon enough. Both the idol and our dwarven berserker quickly lose health. The race is on. The idol is near death but won't go down, Cadrax almost falls, I pause - why doesn't it die? Well, because I have accidentally left the AI scripts on, and Cadrax switched from the idol to a random nearby undead. I deactive the script and focus his attacks on the idol again. With 15 HP left, he manages to destroy the idol, and the undead start dying:
Icewn003.png
While they die almost instantly, the game does take a time to process their deaths due to the sheer numbers - and as it turns out, one spell is actually already in the air when the idol gets destroyed - a searing orb hits Cadrax a second after his triumph, and he dies:
Icewn004.png
Well... at least Angor can just resurrect him after we pick up his gear, so not much was lost. Still, don't try this at home. This was a very stupid decision, and I don't quite know why I did it that way.

Well, we get another badge here, and we find the place we're supposed to put these badges. Three of them are still left, so we have to find three more bosses down here. First, we go after a guy called Marketh. We've already heard about him from a few NPCs. He seems to employ a bunch of stealthed thieves - they are easy enough to lure out by sending a tanky character ahead of the group (though behind an invisible Tenobal, who's looking for traps). I am fairly confident that I am missing some types of interactions here - I have some items that I was hoping would open a few peaceful solutions/dialogues, but I end up having to kill almost everything in this area. Eventually we make it to Marketh, who calls in his guards once we decide to attack. This includes a spellcaster who actually does use some defensive buffs, and so we get our first chance to actually use breach:
Icewn005.png
Marketh himself is easily slain. Two badges to go... We enter the artisan district, fight some umber hulks and blind minotaurs, but before going further we remember to return some food to the deep gnomes, who tell us about a path to their hidden village - first, we have to deal with a huge umber hulk ambush:
Icewn006.png
Back there, we get more experience and find another merchant, the despicable Nym. He does have a few nice items, though, and we spend almost all of our gold (most notably we finally get more magical arrows). Now the only road not taken yet leads to Malavon's dome - I remember Malvon's name and him being a high level wizard, so I buff up before entering. He isn't too happy that I found this golem control book:
Icewn007.png
We charge and kill him, or, as it turns out, his simulacrum. Still, there are a ton of high level scrolls in this part of the lair. Further west, we find the real Malavon. He has a cloudkill going, and a few defensive buffs, and cloudkill interrupts Nahema's attempt to breach him, but our weapons get through his protections eventually:
Icewn008.png
Very good... Another badge is ours. I was hoping I could now help this poor drow woman, but she wouldn't leave, despite me offering her a potion to deal with her condition:
Icewn009.png
I am fairly certain I missed a fair bit of dialogue and maybe even a quest or two in this place. Well, we do have a bit of a problem now: There doesn't seem to be another area to explore, and there's still one badge missing:
Icewn010.png
It seems like I have missed something. Maybe I haven't looted some enemy, haven't seen an area transition, maybe there's a secret door somewhere or I've just been blind. I guess it's time to backtrack...
And since we're already going to have to walk around for a bit, we go outside and travel to the Severed Hand to deliver more goods to the gardener - he disappears after we give him what we have, so the quest seems to be done. Nice. The experience also gets us more level ups - notably, Nahema has improved haste and PFMW now. Next time (propably later today), we need to find this missing badge. I am honestly not sure where it could be - I've made sure to enter and explore every single area that I've found throughout the game.
 

Enuhal

Habitué
Messages
199
The Missing Badge and the Endgame

So, I checked every nook and cranny of lower Dorn's Deep and found nothing (though I did pick up a rhino beetle shield I had forgotten about comissioning). Going back to Wyrm's Tooth - nothing. However, in the upper part of Dorn's Deep, I finally found an area I had missed - a cave, with the entrance not too easy to spot (though not exactly hidden) - why didn't I notice it before? Not sure. One possibility is that the map marker for it was a bit further to the north, and while the actual entrance was in my view, the map marker was not visible on my map during my first time here.
Well, clearing out the cave turned out to be extremely easy:
Icewn000.png
This guy had the badge (already looted in the screenshot). Very well... I travelled back to Kuldahar again to see if I wanted any more potions and inadvetertantly managed to get my new rhino beetle shield enchanted (though it was only the smallest of upgrades). Now to use the badge - we finally meet Poquelin (I know who that guy really is, this I certainly do remember), and we injure him with a quick assault:
Icewn001.png
We get teleported back to Easthaven, where we get our hands on the sword from the lake and free the villagers. We meet Pomab again, and finally (for pretty much the first time) I actually get something useful out of having true sight memorized:
Icewn004.png
The False Pomabs don't exactly disappear, but they are visually distinct after casting the spell. Still, the real one teleports around and heals a bit, until he's suddenly dead:
Icewn005.png
I'm fairly certain at this point that only Belhifet is left, so I buff up with everything I have (a few potions are already active). This turns out to be a waste of time and resources - Pretty much during the cutscene/dialogue, all of our buffs get dispelled (with no opportunity to even cast SI:A):
Icewn006.png
That is unfortunate. Also unfortunate: After trying to retreat a bit we realize the area is filled with traps (Tenobal detects some of them, but they can't be disarmed), and two iron golems go after us, also using their poison cloud effects - we decide to flee out of these clouds towards the east instead:
Icewn007.png
So, first steps: Ajrina calls in a fire elemental to disctract Belhifet, following up with Bless. Cadrax enrages and uses his chaos card set before going after the golems. Angor equips Conlan's Hammer and goes after the golems as well, also getting ready to cast recitation and prayer. Tenobal also takes on a golem, using the singing blade. Nahema starts with Emotions: Hope and Courage, following up with haste. The golems are, surprisingly, not that hard to kill:
Icewn008.png
Belhifet takes down the fire elemental and hits&poisons Cadrax, who uses an antidote. However, with both golems dead, we can focus our attentions entirey on the devil. We start dealing some decent damage as recitation and prayer are starting to get added, but Belhifet goes after Nahema, who is quite vulnerable after the dispelling of her buffs. She has to retreat after taking a hit, preparing to cast stoneskins:
Icewn009.png
Turns out Belhifet is fairly easy to kite - he's not that fast, and he doesn't immediately switch targets. We get some good damage in. While Nahema renews her buffs, recitation and prayer are now in, making it that much easier for our fighters to get in some good hits. Belhifet switches to Ajrina, who doesn't have ironskins, but she can easily retreat to the west - and meanwhile, the others just deal great damage. A few seconds after this screenshot, Belhifet goes down:
Icewn010.png
Very nice. The final battle was certainly not easy, but I think that mostly came down to the dispel and the traps.

All in all, I actually think the lack of powerful and well-scripted spellcasters in comparison does make IWD a lot easier to no-reload compared to the BG games. Fighting was mostly about attrition. Thinking about a strategy beyond buffs, summons and healing was rarely required, especially after we were done with Dragon's Eye. Still, it was a nice distraction and wasn't as grindy as I had remembered (Dragon's Eye was the longest and grindiest dungeon, the others were comparatively fine).
 
Top Bottom