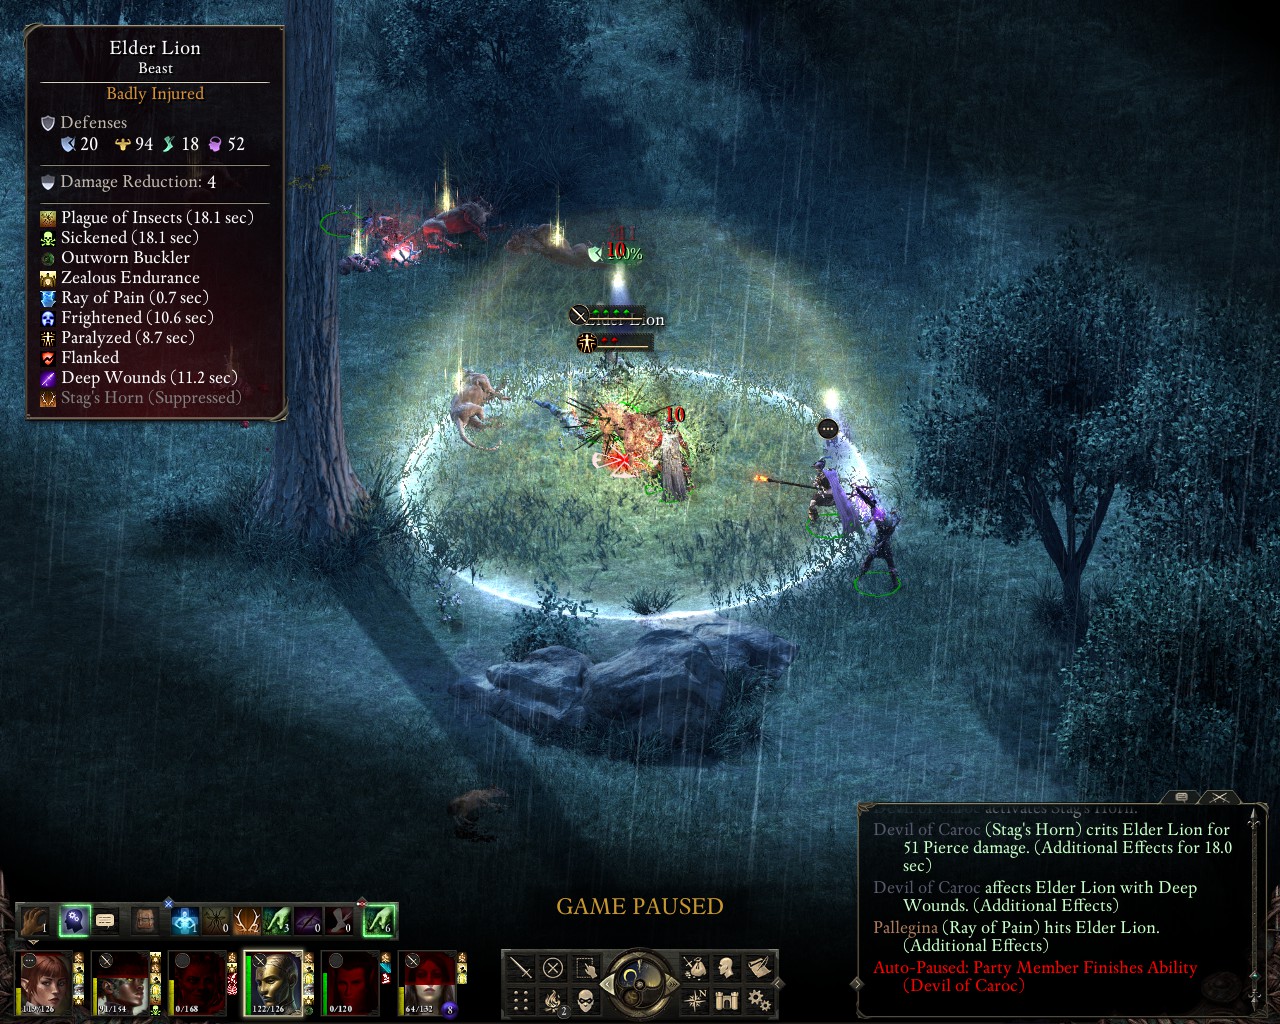
Tales of the Watcher: A Pillars of Eternity I + II No Reload Thread

Enuhal

Habitué
Messages
199
Aldare, Priestess of Wael - Second Update: Finishing up Chapter 2

Back to Defiance Bay - we deal with the remaining quests in Ondra's Gift. Shades in the lighthouse are now much easier to deal with, as we have access to huge amounts of fire damage with Maneha and the summoned firebrand sword:
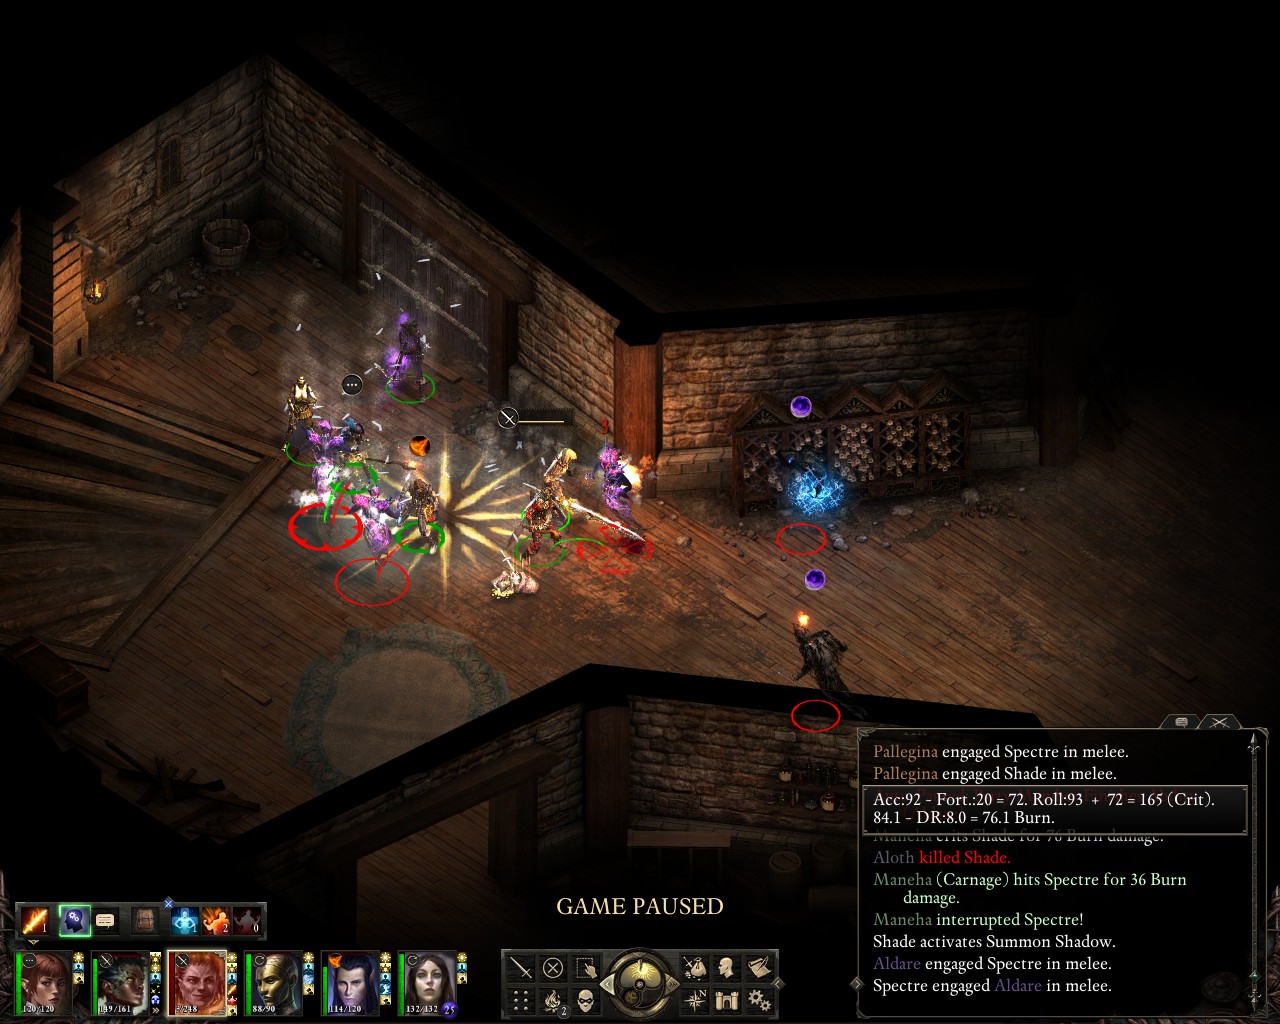
20260309115046_1.jpg
After quickly finishing The Man Who Waits, by far the easiest of the three Hardret House quests, we help Kurren out with Ludmilla - avery nice Silent Scream by Grieving Mother here:
20260309122833_1.jpg
The Forgotten are next on our list, and we make sure to buff with Prayer against Bewilderment as their wizard is known to cast Confusion. Things work out very well:
20260309123534_1.jpg
Now, on to Heritage Hill. Maneha is getting incredibly strong very quickly - this is partly because the Belt of the Royal Deadfire Cannoneer upgrades incredibly fast (unlike most other soulbound items), partly because she just has good stats for a Blood Thirst build (high might, decent int), partly because she is getting her accuracy, otherwise her weakest point, boosted by a ton thanks to Aldare's priest buffs. Her damage output against everything that isn't immune to fire damage already dwarves everyone elses (since most of the game is spent fighting groups, not single enemies. She just cuts through these vessels like they are butter, even the charmed crucible knights in full plate armor take tons of damage from her:
20260309124708_1.jpg
However, Aloth, Grieving Mother and the DoC still have their place due to their debuffs and their range advantage, which allows them to quickly take down specific enemies in the enemy backline - dangerous spellcasters for example:
20260309134440_1.jpg
After all, barbarians only get their Leap at level 13 in Pillars 1, and we likely won't even reach that level in this run. Maybe picking up Wild Sprint instead could be worth it for more mobility, but I am not entirely in love with the fact that it's per rest, and there are so many good passives to get as well...

Being done with Defiance Bay now, we move to the wilderness areas, clearing out the Wooded Plains and travelling to Stormwall Gorge. Here, we get into the first really troublesome encounter of the run. We encounter a group lead by an adragan, with pwgras, menpwgras and (elder) lions - my memory propably failed me and I just didn't remember such a dangerous enemy group existing out there in the wilderness. Mind you, there is no good reason to even take this battle, as there are basically no rewards, neither in experience nor in items. However, we kind of run into it, and, of course, the adragan immediately dominates Pallegina. As a result, the unprepared Maneha is suddenly surrounded and flanked my a huge mass of foes and gets knocked out very quickly, while Grieving Mother at least manages to catch the Adraga with Mental Binding, though we aren't able to put in the damage for a quick takedown:
20260309143438_1.jpg
We get control of Pallegina again, and she uses reviving exhortatoin to bring back Maneha - however, the beasts have swarmed and killed Aloth in the meantime, within seconds - and that's with him having Hardened Veil active. We realize at this point that we're in deep trouble and call in the figurines:
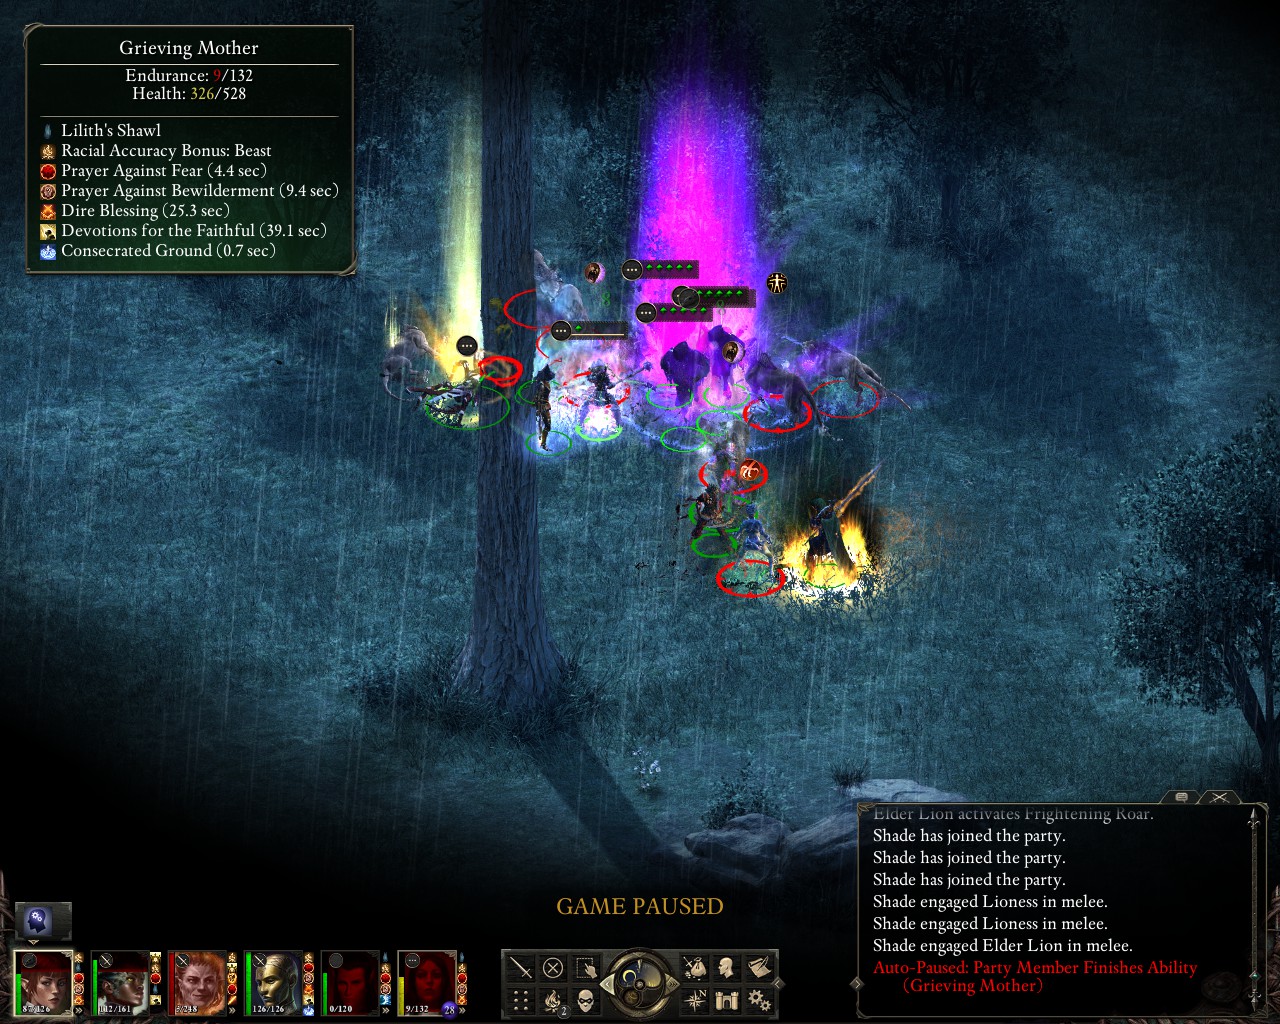
20260309143856_1.jpg
Grieving Mother is almost knocked out as well, but a mental binding on the lion attacking her (busy with its roar ability, which Aldare has already prayed against) allows her to run out of engagement to the south. Meanwhile, we're just not finding a way to take down this Adragan (who has buffed up with Moonwell), as Maneha gets swarmed and knocked out for a second time. We take out the big guns, basically our final way to take over a battlefield with our figurines already in use: DoC's menpwgra form thanks to the Witch's Hat. Insect Plague and the like, lots of dots on everything in the area. Throwing all our abilities at it, finally Aldare gets the kill on the Adragan with an iconic projection of all things.
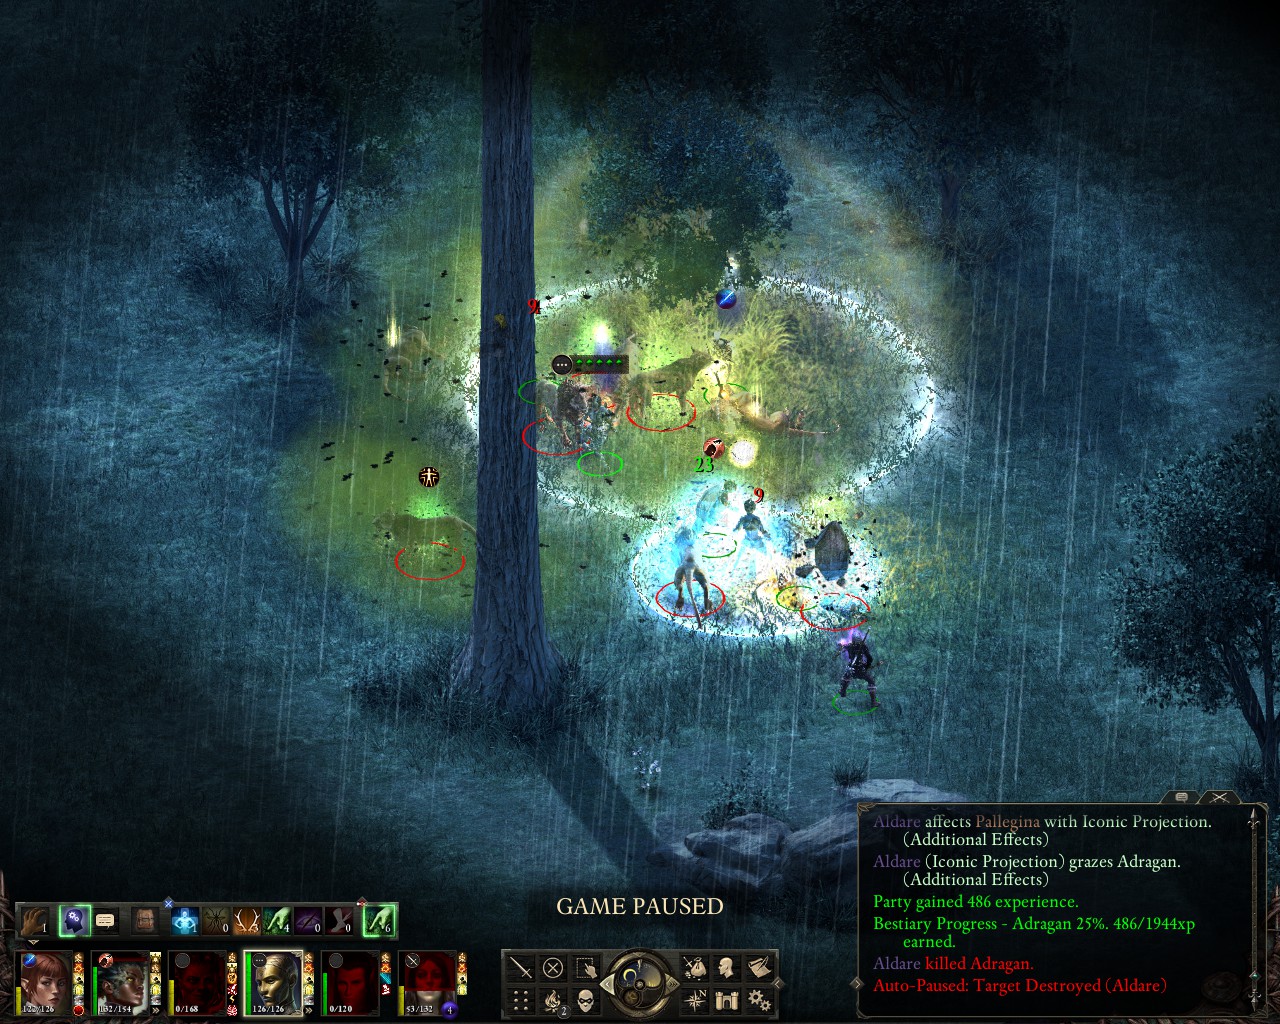
20260309144416_1.jpg
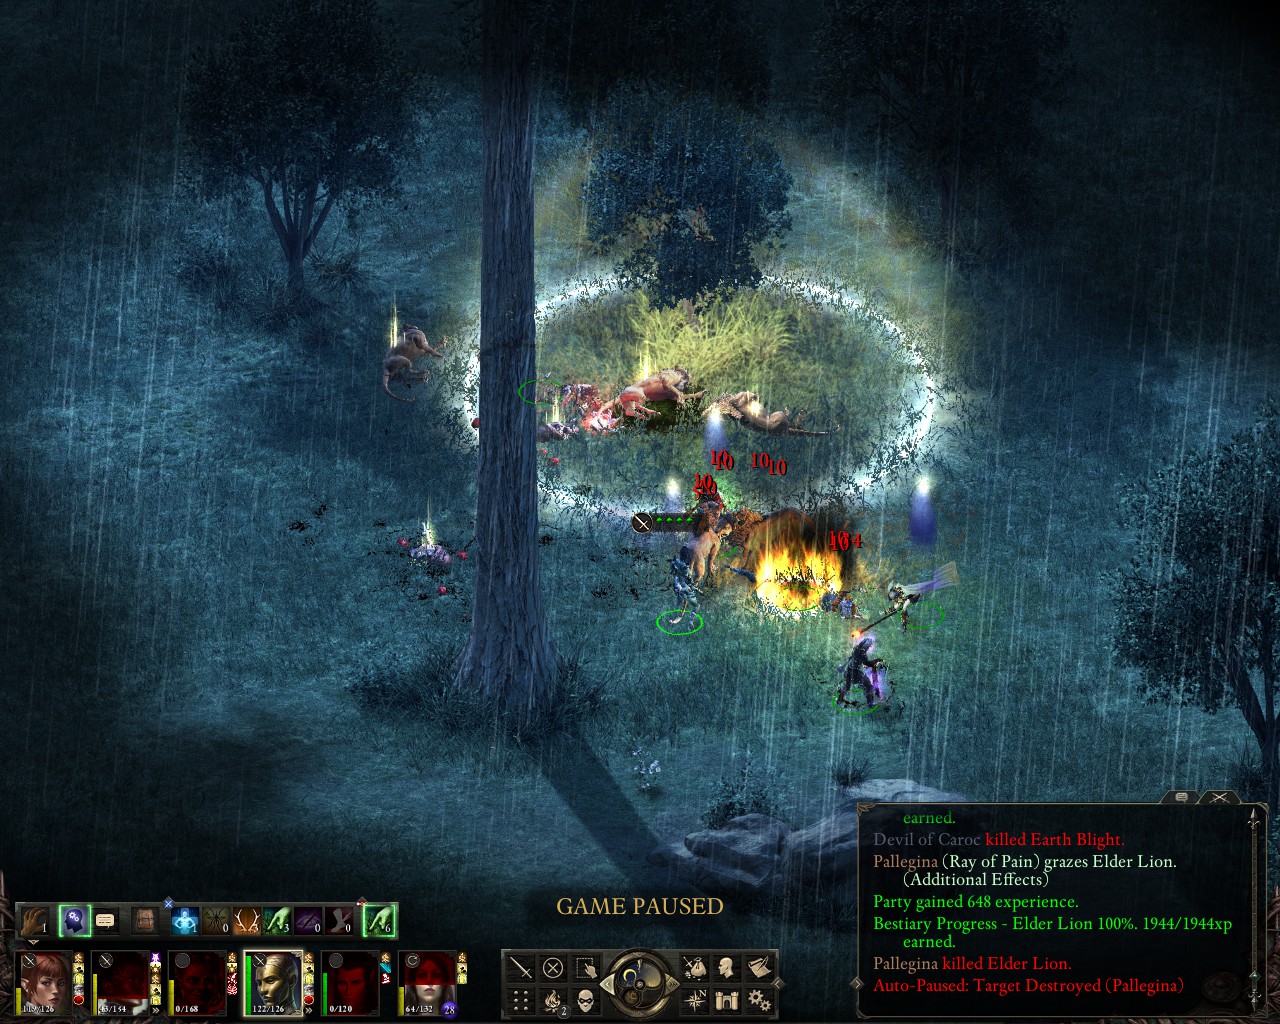
In low numbers, low level cipher abilities really shine: Grieving Mother is able to charm one of the remaining lions and keep another one in check with mental binding. With two party members down and the others basically out of abilities, this gets the job done, though it is a close and painful battle:
20260309144607_1.jpg

20260309144635_1.jpg
That was tough. We really should've avoided this battle entirely. Without the Witch's Hat we might not even made it through it.

Well, we make it to Dyrford, though most of the sidequests will have to wait, as we are at level 9 and go straight for Through Death's Gate. We manage to pull most of the druids and pwgras into good positions for us, there's only one group where we have no choice but to go for a direct engagement, for which we use scrolls of defense and protection:
20260309155055_1.jpg
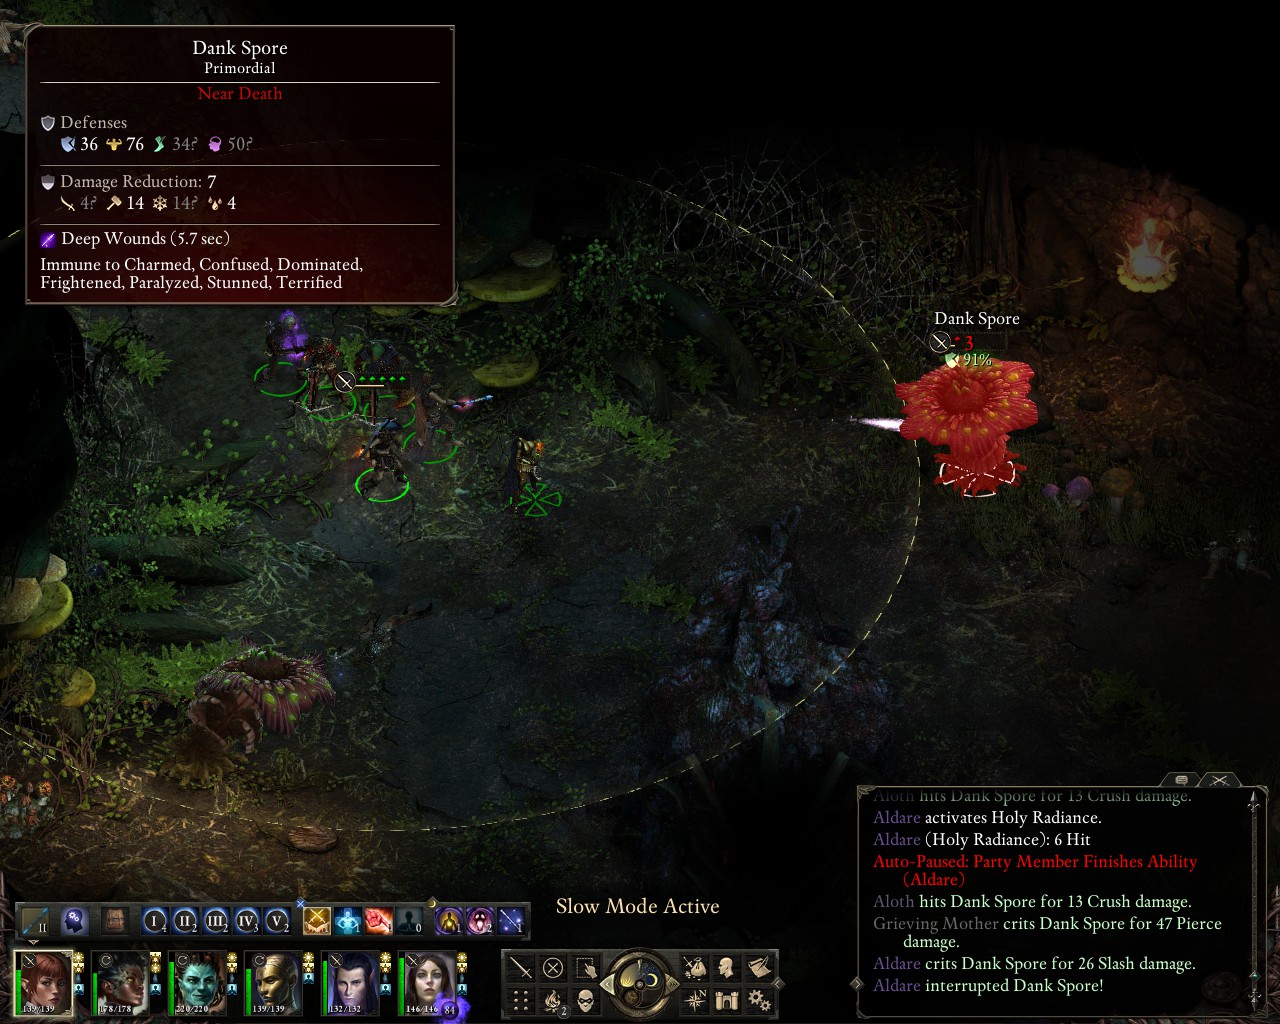
Historically, the spore battle at the end of level 1 has often been a problem for me. Not this time - after pulling back the sporelings, we use the fact that the DoC has full charm immunity (which is usually not accessible at this point - confusion immunity for the dank spores is there, but the swamp spores have actual charm abilities which we could improve resistance against or supress for a time, but full immunity isn't an option) and that these spores aren't the smartest at targeting. Basically, everyone equips ranged weapons (the traps in this room are partially directly in front of the spores), the DoC leads the charge, gets rid of some traps and we start carefully and methodically shooting down the spores one by one while they try to somehow affect our metallic friend, who only takes very light damage:
20260309155709_1.jpg

20260309155920_1.jpg


Now, that is definitely a good use for this companion!

Well, the second level is easy as per usual, we go through the Animancy Hearings, and next time, we will venture into Chapter 3!
 

Attachments

  • 20260309155709_1.jpg
    20260309155709_1.jpg
    341.8 KB · Views: 171

Enuhal

Habitué
Messages
199
Aldare, Priestess of Wael - Third Update: Chapter 3

In Elmshore, we only take a few minor battles, including another one against an Adragan, though this time, we are prepared (because I know about this one) - Approaching with the charm-immune DoC first, luring our foe back and activating Mental Binding and a full assault - which works this time:
20260309163855_1.jpg
This is mostly done to pick up the monk's missive on our way to Twin Elms. We don't stay here for long, instead returning to Caed Nua for the Battle of Yenwood field. We're still at level 9, so it's not all that one-sided. Most of our allied troops fall, but with big AoE spells like Confusion on our side, we eventually take control of the battlefield and take down Lord Gathbin:
20260309172018_1.jpg

20260309172432_1.jpg

20260309172743_1.jpg
After that, we make it to Searing Falls and take down Cail, which is easy enough at this point:
20260309180617_1.jpg

20260309180700_1.jpg
This gets us to level 10 - next is Dyrford Crossing, which we have mostly skipped and will return to now for some extra experience and the Lead Spitter blunderbuss for the DoC. We also need gold - since we're skipping stuff like bounties and endless paths, our resources are very limited, and I need to upgrade some specific items to exceptional, plus buy some more stuff from vendors. The Crossing is easy enough - with Grieving Mother in our party, we actually free Aeldys for once - however, I haven't done this fight in ages and didn't remember that it's actually quite dangerous, so Aldare gets knocked out - luckily, Pallegina can resurrect her and in the end, it does end up being a relatively easy victory after Aloth lands a Call to Slumber:
20260309230548_1.jpg
I decide not to clear out the entire place, as that seems tedious (though the gold would be useful). Now we go into the Act 3 areas proper, with Elmshore being the most dangerous one - battles against groups with adragans are already dangerous (Supress Affliction and/or Withdraw to deal with petrification were quite useful here), but the ogres to the north definitely take the cake - I had to go all out here, twice, to survive, with scrolls, figurines and the like, as their AoE knockdown attacks and insect plague from their druids both can hurt quite a lot:
20260309232751_1.jpg

20260309233253_1.jpg

20260309234929_1.jpg

20260309235451_1.jpg
The Northweald is much easier, which always struck me as strange. We deal peacefully with the sky dragon, finish Berath's god quest after reaching level 11, and, since we have Prayer against Treachery now, defeat Lord Raedric for a second time. This quest does give a HUGE chunk of XP and almost gets us to level 12 (which will be our final level up):
20260310012024_1.jpg
We make our way to the Rimebound Temple, pick up Wend-Walker as a new weapon for Aldare and let the Pale Elves go - our intellect score is high enough to still get credit for the quest. Level 12 is ours, and, as a final (though unneeded) task before getting ready for Thaos, Aldare deals with Galawain's quest - we help Sul keep her place - with our own petrification effect now, Gaze of the Adragan:
20260310093954_1.jpg
 

Enuhal

Habitué
Messages
199
Aldare, Priestess of Wael - Fourth Update: Sun in Shadow

With our last bit of cash, we upgrade our armor pieces, buy dragon meat dishes and the ebony spider figurine. Now, we jump into Sun in Shadow and make our way towards Thaos, which is not much of a problem. For our final rest, we use a survival scroll to get access to the second level of accuracy bonuses against vessels:
20260310112141_1.jpg
We prepare with all kinds of food and engage Thaos - Pallegina tanks him while the others call in figurines, drink alacrity potions and start dealing with the Judge and Headsman. Meanwhile, Aldare starts buffing against Bewilderment, Imprisonment and Treachery to avoid any hard crowd control effects from hitting the party (though I think non-upgraded Thaos only requires Bewilderment):
20260310112919_1.jpg
However, the DoC is a bit too close to the Headsman and gets hit by its melee attacks - she is knocked out, but Pallegina resurrects her. Grieving Mother's Mental Binding is a bit too late - but still very useful:
20260310113116_1.jpg
Shortly after that, Thaos goes for an attempt at Confusion, which fails due to our buffs, and we bring down both vessels:
20260310113252_1.jpg
As we start focusing our attention on Thaos, Aldare suddenly gets knocked out, I believe by a Cleansing Flame - not good, because she's the one with all the resurrection spells now that Pallegina has used hers:
20260310113328_1.jpg
Thaos has very high defenses, we buff our accuarcy further with War Paint. Sadly, with Aldare knocked out, we can't renew our defenses, and the Prayer spells run out - resulting in Thaos being able to dominate Aloth. Pallegina heals up the DoC with Greater Lay on Hands, and our vessel turns into a menpwgra with the Witch's Hat:
20260310113429_1.jpg
Grieving Mother shows how to take down powerful single target enemies as she even manages to get in a graze with Mental Binding - the paralyze effect drastically lowers Thaos' deflection and reflex defenses:

20260310113514_1.jpg


Meanwhile, with Disintegration, Tidefall and Deep Wounds adding more damage over time, everything we do amplified by Recall Agony, the DoC's Stag Horn spells deal the final bits of damage to end the fight:

20260310113521_1.jpg


All right! Not super close, but also not super comfortable. Thaos' Cleansing Flame is always dangerous and hard to avoid. In the end, our preparation was enough. As we switch over to Deadfire, some thoughts on our party members in PoE1:

Pallegina shows, despite suboptimal stats, that paladin tanks are great and surely the best choice in the first game. Aloth has strong buffs and debuffs, plus some okay damage output - in particular, Confusion proved important in the midgame to gain control over chaotic battlefields. Aldare, as a Priest of Wael, was of course very strong, but any priest would've done the same. Note that I was basically forced into getting the honest 2 disposition due to two quest outcomes / dialogue trees that would've otherwise forced me into getting the wrong reward (one of these times, I didn't even have a real choice). Not ideal. Grieving Mother I've already played with a bunch, a Cipher of any kind is always good to have for crowd control - the soulbound arbalest from the Deadfire Pack was good, but not mind blowing - also took longer to upgrade than I expected. BTW, I never got the 15 confusion afflictions for the Company Captain's Cap on Aldare - stuck at 14 at the very end. Seems like only a tank can upgrade that in a reasonable time, but Pallegina is a godlike and can't wear helmets.
Now, the DoC, the only one I'm not very experienced with anyway, was pretty good imo - I didn't use her in the most damage efficient way for a rogue, with arms bearer and weapon swapping numerous fierarms plus lots of passives and actives with bonus damage instead of melee dual wielding. I think her disadvantages, the fixed armor with high recovery (for a rogue) and inability to use food/drugs, are very much worth it - the immunities she gets have a lot of utility and offer a lot of safety. Also, the fact that her trapper background nets her lots of mechanics is nice. Unless you want to build a glass cannon rogue (which is not always ideal for PotD no-reload but can still work, with the right playstyle), she does seem like a very good choice.

Maneha easily topped our damage meters, even long before the end, despite the fact that she was recruited only at level 7. Bloodthirst is such a strong ability for that purpose, combined with carnage and a big two-handed weapon - Firebrand is of course one of the best choices, and the belt + gloves do give more than enough instances of it, but even with Tidefall she absolutely rocked. Great for large groups of enemies of any kind, plus she was also surprisingly tanky and hard to take down, unless she got completely swarmed in melee combat.

Time to go into Deadfire! We're going to keep Pallegina as a full paladin here (while this is most likely not going to be very effective compared to taking her along as a Herald, I do want to practically test out the high level paladin payoffs), the others will be the remaining missing sidekicks: Konstanten, Fassina and Mirke. The latter two take a bit of preparation to recruit, but not really any combat, so this will not be a Vatnir situation where I swap my party halfway through the game - more like the usual post Act I party assembly, in practice (though I will have to do a chunk of non-combat quests in Neketaka and Fort Deadlight without them) - I will also create an additional custom character to replace Xoti for Chapter 1, similiar to what I did in PoE1 with Durance, because I don't like doubling up on priests for these early challenges.
 

Enuhal

Habitué
Messages
199
Aldare, Priestess of Wael - Fifth Update: Maje Island

Aldare picks up Edér (as a Swashbuckler), frees Riggere and deals with the Kraken Eye room situation peacefully, reaching level 2. We recruit an Oracle (Ancient/Psion) and a Herald (Shieldbearer/Troubadour - wanted to test out the latter, but I don't like that the increased phrase cost means that I can't cast start combat with an immediate phantom summon). Since I've already done the dig site battle with just 3 party members when playing Trisk, I decide that I can propably do it with 4 safely enough, if one of them is an Oracle. We do the quests around town, deal with the random encounters peacefully, and clear out the sea cave at the beginning before buying some gear. The chokepoint near the ladder allows us to be relatively safe for the boar/wurm battle at the digsite, with sporelings, phantom and Whispers of Treason helping out the party:
20260310152426_1.jpg

20260310152812_1.jpg
After that, we rest with Captain's Banquets to avoid the dragon's fear aura and increase our upcoming action speed.

Initially, our Herald tank takes some damage, but we get in a good Charm Beasts and a good shot on the explosive barrel, which kills one wurm and wounds the young drake (I did make a mistake here of foolishly thinking, from mistaken memory, that a spark grenade would explode the barrel right away - I had to take two full pistol shots after that to actually get the explosion mid combat, otherwise we would've also killed a young panther at least) - the charmed beasts easily take down the drake, with the help of our sporelings and phantom we turn on the various young panthers, re-charming one of them with Whispers of Treason once the beast spell runs out. After that, the cleanup is only a formality, and we barely needed to use any of our healing options at all:
20260310153857_1.jpg

20260310153933_1.jpg

20260310154012_1.jpg

20260310154312_1.jpg
Aloth is recruited as a Spellblade for once, and we enter the sub-arena level. The ancient training hall is left for until our two recruits get level 4 as well (especially the Oracle might be vulnerable there).

The key down in the ruins is a) charm one or more of the spiders (if Charm Beast doesn't hit, we always still have Whispers) and b) make sure our sporelings are ready once combat starts, so we pull most opponents back quite a bit.
20260310161536_1.jpg

20260310161824_1.jpg
For the final group, we use searing wounds and swap a few weapons to pistols, for their veil-piercing effect against the spirits. The battle works out surprisingly well, we end up feeling very safe. Propably the best I've done down here so far.

20260310163711_1.jpg


We track back to the training hall, switching to blunt (or at least non-piercing) weapons and use whispers and sporelings again to get an advantage, even taking over the enemy wizard with my second try (luckily, his pathing was really strange and he rushed towards us instead of casting a spell at range, otherwise he probably would've been able to get at least one one of them done).
20260310164333_1.jpg

20260310164507_1.jpg
Time to sail to Neketaka!
 

Enuhal

Habitué
Messages
199
Aldare, Priestess of Wael - Sixth Update: Neketaka, Fort Deadlight and Dunnage

Before sailing away, we rest using Hylea's Bounty, and I make the mistake of not removing the captain's banquets from the other party members food slots. As a result, we lose 3 banquets for basically no reason... not good. This means I may have to make some Dunnage rounds to pick up additional oysters and luminous lobsters.

Well, we sail to Neketaka and pick up Konstanten as a skald. Since Fassina doesn't get evocation spells, she can't fill in the typical AoE spell damage role quite as well (though she does get a few less powerful options) - I want Konstanten to help out here with heavy use of offensive invocations and one-handed weapon style to get a higher crit chance for the skald bonus. Pallegina is our next recruit, as a single class Paladin, though I am assuming that the payoff won't be very impressive and she would be far more effective as a herald. We do some questing in Neketaka and quickly make sure to complete The Archmage's Vault via infiltration so we can recruit Fassina as a conjurer, which will be first time I am playing with this subclass (which doesn't seem very strong compared to generalist wizards, evokers or even illusionists). While questing in the Gullet, where our primary goal is to make it to Mad Morena so we can pick up a Principi Flag for "Blow the Man Down", we run into an unexpected battle I haven't had to fight before - Aldare, being a Waelite, does pick a lot of conversation options I usually never take to get her dispositions just right, and the shady/deceptive option when confronted by a couple of thugs, much to my surprise, leads into fighting them. However, that fight turns out to be very easy indeed.
20260310223043_1.jpg
No random encounters in the city, so no further battles for now, and we move to Fort Deadlight, blow up Benweth and recruit Mirke as a monk - the party is complete. Konstanten has already picked up his singing scimitar, a key item for the party as it allows him, with the right upgrade, to empower a chant every single fight. For now, our primary choice for damage is "Seven Nights She Waited" - the Dunnage street battle is the first real opportunity for a test of its power:

20260311002553_1.jpg


Yep, that is some pretty impressive damage for this point in the game - however, it is also not exactly easy to aim, and I've already noticed that some surfaces can make it bug out and stop travelling along, which is somewhat frustrating. Mirke is mostly using self-buffs and efficient anguish, Fassina mostly buffs a bit, summons a weapon and calls in a projection before attacking. Pallegina mostly just tanks, using healing spells and other exhortations when needed, plus some FoD or her unique order mark - but the damage this one deals has been heavily, heavily neutered compared to PoE1. I do feel like we might be lacking some AoE power, because Konstantens other invocations have a terribly small AoE so far. Also notable, for once I don't have anyone using The Red Hand, a staple of my usual playstyle - Fassina does a decent impression of a good physical single target damage dealer once her buffs & setup are complete, but it's really not a favorable comparison for her.

We've gathered back in Neketaka, a trip south for exploration & bounties is in order. This will give us more experience with our combat setup, though because we're generally pretty overleved for this part, a more reliably picture will arise once we start taking some battles to the east, where enemies aren't quite as weak.
 

Enuhal

Habitué
Messages
199
Aldare, Priestess of Wael - Seventh Update: Southern & Eastern Exploration, Motare o Kozi, Old City

Southern exploration goes quite well - all in all, very uneventful:
20260311113801_1.jpg

20260311114912_1.jpg
An early visit to Motare o Kozi is in order, since I want to pick up Nerian's Ward and now know how to reliably do it without having to fight a single battle. We also hunt down some bounty ships in the east on the way back before turning over to the Forgotten Catacomb. The scriped event on the way causes everyone to get an injury, as we fail the survival check (note for my future self: the athletics check is fine, but just stand your ground instead of trying for survival next, the difficulty is too high) - still, fighting these vessels is easy enough, and Aldare's Radiance, boosted by full disposition bonuses, works wonders, though the real star is Konstanten's Seven Nights She Waited:
20260311163330_1.jpg
While being surrounded is usually very bad, for aiming with this spell, it's actually very helpful.

After that, we rest with Captain's Banquets (we have found enough materials in Dunnage to replace the ones we wasted initially) and take on the Ancient Death Guard to get Pallegina her new armor:
20260311164135_1.jpg
While I am barely making any use of the low level invocations, The Shield Cracks stands out as being constantly useful as a super powerful anti-armor tool when penetration can be an issue. Well, we also land in Tikiwara for the local quests (not the Storms yet) and deal with the other required exploration islands, most importantly picking up Aldare's new Weapon, The Eye of Wael, which fits both in flavor and abiltities (most notably, the +2 illusion power levels). After some more bounties on our way back, we do quest turn-ins in Dunnage and Neketaka. Having hit level 13, Konstanten gets a new powerful damage invocation, "So Singt ehy Biting Winds o' Eld Nary" (which I am just going to call Biting Winds) - I've never used that one before. It's a foe-only targeted attack that jumps around among the enemy lines - 5 hits in total for this version, but it can be upgraded to a total of 13. We get the ooze random encouter as a perfect opportunity to test it out:
20260311165508_1.jpg
Yep, that works very well. It has a huge range and doesn't have the troublesome aiming problems with Seven Nights She Waited. It can also bounce back to an enemy it had already hit, so it's great against both small and large groups (though not perfect against really, really big groups - but with Sasha's Singing Scimitar, we can always fire off two of these, the first one empowered, in a row, so we can relatively quickly hit 10 targets for over 100 damage each. Since we're in the city, we also do A Glimpse Beyond:
20260311170610_1.jpg

20260311170853_1.jpg
On to the Old City. Here, I learn that Biting Winds actually has a downside that has to be considered carefully upon use. It's mostly "use it and forget it", but since it is a targeted spell, it can actually be reflected by spell reflection abilities commonly used by some enemy wizards, even if they are not the initial target - and from there, it can bounce between your own party members! This happened to me when fighting the skeletons around the pool you have to dive in in the old city - an easy battle for us at this point, if it weren't for the fact that Biting Winds got reflected and absolutely demolished our party, knocking out Pallegina and Aldare, who got back up again due to the charge-based resurrection ring from the Deck of Many Things:
20260311233643_1.jpg
Our first combat injuries for this run (well, Aldare really doesn't get one because the ring removes them - it's really worth getting that one as soon as you have the ship nearby). Luckily, the spell eventually stops bouncing and we can clear up the remaining skeletons. Now, my experience with enemy wizards is that they usually don't open up with arcane reflection right away, it's typically something they cast as maybe a third or fourth spell if they have it at all - so it's usually not the biggest deal, but can be a problem if we're not careful with a mid-combat invocation.

The giant cave grub gave us no toruble - the fact that Mirke can constantly interrupt enemies for just one wound each is pretty helpful against big enemies like this that rely on devastating special abilities:
20260312000532_1.jpg

20260312000641_1.jpg
We also pay a quick visit to the Hanging Sepulchers and clear them out, and our turn-ins get us to level 14.
 

Enuhal

Habitué
Messages
199
Aldare, Priestess of Wael - Eighth Update: South-Western Exploration, Hasongo, and Neketaka faction quests

The party sails to the southwest. There's a scripted event based injury we take from some languafeth before clearing out the Ruins of Amira's Roost - the battle to the east offers some high level delemgarn/menpwgra, which we lure back to isolate them, but more importantly bog oozes, who have essentially infinite uses of insect plague (though they only cast it infrequently) - we use antidotes to counter the effect as best as possible. Notably, these things seem to be level 16, which is certainly dangerous. The battle takes us quite a while, though our party is luckily very durable, if not great at dealing huge amounts of damage at this point:
20260312142945_1.jpg

20260312144103_1.jpg
Next up, we fight a few Eoten, using Konstanten to keep them paralyzed for much of the fight, which is easy enough due to their weakness to dexterity afflictions:
20260312144811_1.jpg
The Sandswept Ruins are interesting here, because I usually have someone I can get to 20 perception to skip most of the traps and the final scripted sequence. However, this time around I only had 16 perception (that is, with two perception boosting items) on Mirke, so I would have had to either sail all the way north to buy another +1 perception item and rest in Dunnage for +3 perception or rest and use svef for a total of +6, which I propably should've done but didn't think about at the time. I resorted to svef anyway near the end of the trap gauntlet as I was simply not detecting the final row of traps and the additional ones after that with 16 perception, and Mirke took an injury as a consequence. With that, we used an implosion charge to destroy the door for the scripted event to ensure our survival (thanks to the wiki for noting that such a charge immediately solves the scripted sequence, which can otherwise kill your party).

Next, we're sailing to Hasongo, which we have delayed for quite a bit. Everything goes very well, I even manage to separate the big northern group of naga from their shamans/totems by pulling them back a bit furthern than usual. Good to know! No screenshots taken here, sadly. After that, we're off to Poko Kohara. The xaurip plaguestrikers are the first potential danger here, though blowing up an explosive barrel near their camp softens up their allies:
20260314110919_1.jpg
For the Engwithan Titan, we have no Double Tap this time around, but we're very overleveled, so we end up being perfectly fine. It turns out the battle wasn't very difficult at all, partly because we have both "The Shield Cracks" and access to two sources for the tenacious inspiration to deal with highly armored opponents:
20260314111513_1.jpg

20260314111558_1.jpg
The ruins themselves are easy enough to clear out at this point, and we return to Neketaka. There, we deal with the bathhouse and the shadow under Neketaka. this time, i remember that Khapa Tea exists as food/drink for full poison/disease immunity, so the bog oozes in the first battle there aren't all that scary anymore.
20260314134341_1.jpg
As per usual, we make a deal with the dragon and turn in the quest. Next up, there's Sayuka, the final few bounties and exploration quests and Crookspur.
 

Enuhal

Habitué
Messages
199
Aldare, Priestess of Wael - Ninth Update: Sayuka and Crookspur

We move to Sayuka, though don't do Overgrowth quite yet, instead facing down with the druids - before that, we rest with Khapa Tea, which is always helpful for any swamp encounters. I'm pretty sure it also helps against dank spores. In any case, we make it towards the northeast for the final two exploration areas, where Aldare gets to use Dismissal against some spirits and vessels to great effect:
20260314202138_1.jpg
Fighting the ancient battlemage lich, we get another instance of Konstanten hurting the party with Biting Winds due to spell reflection:
20260314202653_1.jpg
However, we have enough healing abilities to get him back up and eventually defeat the heavily buffed lich once his buffs run out:
20260314203125_1.jpg
While we're in the area, we also complete Berkana's Folly:
20260314205608_1.jpg
I like to take stock of the party once in a while to check what the raw numbers tell us in terms of their performance. First of all, it is quite impressive that we have only taken two injuries in combat (both due to reflections of Biting Winds in the Old City) - the party is very tanky, which is a result of a) spending most of our early gold on the best buyable pieces of armor in the game, b) Pallegina's zealous endurance aura and c) Konstanten's defensive chants. Plus, our equipment is fairly defensive in general. The damage, by now, is also quite good - it has to be noted that most of that is absolutely carried by Konstanten, though - I've never played with a party where one party member dominated the "damage dealt" stat quite like this, even when taking Maia along. Given the fact that he's also super tanky and even has access to crowd control and resurrection (and could even get very powerful summons if I didn't specifically chose not to pick up any of those), it seems to me by now that chanters in Deadfire are just insanely versatile and powerful.

In any case, we move on to Overgrowth - since we're not fighting the kraken this time around, it's quite easy to do and nothing worth mentioning really happens. The same is true for Crookspur - while it pains me to do it, to get the endings I haven't gone for in this thread we need to side with the slavers this time around. Turns out there's almost no dialogue written for this route, maybe the writers just assumed that nobody would want to do this anyway. Well, this version of the quest is just as easy as siding with Ori o Koiki, it's not even worth to try the stealthy sabotage options given around the place.

Only the endgame remains - Ashen Maw, the final two VTC quests and Ukaizo. We are also finally at level 19, which means we get acess to our ultimate abilities, which will, in theory, show if sticking to the various single classes we've chosen here is worth it. However, given the fact that we're almost done with the game, we propably won't see much of these abilities - they would be far more impactful if I actually chose to do the five endgame areas and three DLCs that I am skipping (not to mention the megabosses - but honestly, high level abilities don't really help there, these are entirely distinct battles that need a completely different approach than all other forms of combat).
 

Enuhal

Habitué
Messages
199
Aldare, Priestess of Wael - Tenth and Final Update: Endgame

At the Ashen Maw, we get to test out our new high level spells - Citzal's Enchanted Army, while being certainly pretty good, feels overall underwhelming compared to the raw power of Missle Storm as a 9th level spell. The cleric choices aren't impressive either, but that was something I already knew. The two monk abilities are indeed pretty damn awesome, and its great that one costs wounds, the other mortification. As advertised, one of the reasons to go single class monk (aside from the fist weapon progression based on power level). However, I still think these are available way too late to make the class very impressive to me. For Konstanten, we are sticking to the upgraded Biting Winds for the most part, though the +1 penetration chant is very helpful. Since I can make use of the legendary upgrade, we do fight the dragon at Ashen Maw. We have great tools to do so, shreddings his armor and even paralyzing him, despite his resistance to dexterity afflictions (Gaze of the Adragan applies petrified, which is technically a hidden fourth dexterity affliction and is downgraded to paralyzed when resisted):
20260315000551_1.jpg

20260315000626_1.jpg
It doesn't hurt that everything here is very weak to frost damage, which is something Konstanten and Aldare (via Symbol of Wael) can provide quite a lot of.
Now, since we're going with the VTC, we have to first complete Skipping Ahead, their special pre-final quest bonus objective. This is very easy at this point, but it is fin because it means we have a few more big battles to test out the high level abilities. Exploding the RDC gunpowder store is just as easy as it was last time around. We get out, finish up the questline and use the vaillian technology to teleport to Ukaizo. As per usual, no guardian battle here thanks to the water dragon, and the two giant constructs just get hit by Aldare's Dismissal spell:
20260315011150_1.jpg
Our final opponent is Furrante. The principi quickly fall before us - Whispers of the Wind and Biting Winds take care of everything, Konstanten's opening spell hasn't even finished bouncing before the battle is already over:

20260315011722_1.jpg


Our final stats - only two in-combat injuries, which is pretty nice!

20260315011754_1.jpg


Some thoughts on the party - this is the most unusual setup I've played with, with no traditional AoE damage dealer or ranged damage dealer at our disposal - Fassina's Conjurer subclass bars her from accessing most of the classic powerful damage spells, and others she has access to are weakened. As a conjurer, I mostly had her buff up, call in a weapon (mostly minor blights, spirit lance and later on the blackbow, which I liked the most due to its frightened effect and bounce-through) and conjure a duplicate. However, the damage output was, all in all, nothing special with this approach (though it was consistent and sustainable even in long encounters). Aldare actually matched it, I think partly because I often had her call in her spiritual weapon after just two or three buffs, and since she's our Watcher, she gets the lash on her weapon upgraded to 33% due to dispositions, which is pretty good.

Skalds rock. Konstanten was awesome. He did by far the most damage, was also quite tanky, had way more utility than I actually made use of, and needed very little babysitting. He doubled Mirke, our Nr. 2, in damage done - and she needed to be looked after constantly (though, to be honest, she could've been quite a bit more effective if I had given her even more attention). The only downside is that his best damage spell can be reflected. Honestly, I believe now that any somewhat decent chanter concept with Saha's Singing Scimitar and a piece of fairly decent armor will just be outstanding pretty much no matter what.

Mirke was my first single class monk in Deadfire. She was decent, but as in PoE1, I am not overly impressed - she got really powerful at the very, very end with Whispers of the Wind, but before that, I think other classes do a similiar job a lot better - even an unkitted rogue. No real point in having a class that only becomes super powerful at the very end when the game is notorious for its easy endgame if you don't do DLCs or Megabosses (single class barbarians in Deadfire are similiar - mostly decent but mediocre, but if you get to the final tier of abilities they get to be absolute powerhouses and can destroy everything in sight within seconds).

Pallegina was my attempt at a single class paladin, but for this one, there's really no point - the endgame abilities here aren't good at all, even worse than the fighter ones, where sundering strike was at least useful. I already expected that, but just wanted to try it out for a bit.

Now, for our Priest of Wael Watcher - yes, obviously, quite good for buffs and debuffs. I did enjoy the subclass in Deadfire, even though I basically never used the defensive abilities due to simply not needing them (wearing a medium shield with the modal all the time helped), Gaze of the Adragan is very nice to have. The Incarnate is, indeed, completely useless for its spell level, though. The symbols are nice (which is true for every priest outside of Woedica), but otherwise I am starting to think that priests don't really need to be single class either. Since I already hold that opinion of ciphers, I am thinking about integrating a priest/psion multiclass in my next playthrough.
 

Enuhal

Habitué
Messages
199
Ifirn, Ghost Heart Ranger, Introduction

When I first played Deadfire as it was released, I imported a Ranger from PoE1, one of my favorite classes in the first game. I was, however, pretty disappointed in the gameplay performance of this character in the sequel - and aside from picking up Maia as a Scout (Ranger with her unique Gunhawk subclass / Rogue), eminently powerful with weapons such as The Red Hand. Ranger is the only class I haven't really revisited and played as a single class character throughout the game. However, since this first run, I have come to understand Deadfire and its differences compared to PoE1 a whole lot better and want to give a single class Ranger another shot.
One thing I've learned from this first run is how much worse the pet has become in Deadfire compared to PoE1, and Bonded Grief is just a killer. This is why I'm picking the Ghost Heart subclass this time around and focusing entirely on ranged damage, with the pet as more of an afterthought (another reason Maia is propably better than most player-created rangers: her unique pet is immune to engagement). Now, I could obviously just play with The Red Hand, which I already now will be powerful in the hands of any character with somewhat reasonable stats, but I've done this in enough playthroughs now, and having just played a successful run without it, I am pretty comfortable not making use of it again. In fact, since I've done firearms with Maia quite a bit, I am strictly going to use non-firearm weapons. I have my eyes on the arbalest Spearcaster and the war bow Frostseeker (which I used for my first ranger, but maybe not to its full potential).

Since I have now played with all official companions and sidekicks, I am back to using a player-created party with some classes I find to be fun and/or powerful. A Herald (Shieldbearer/no subclass Chanter) as a tank, an Ancient Druid (single class this time, I want to go for high insect plague powerlevels), a Priest of Eothas/Psion multiclass (I think both of these don't get a huge payoff for staying single class and provide a lot of utility, plus I love combining Psion with other spellcasters, as they can use their other spells while focus regenerates) and a no subclass Wizard (I like the flexibility of not picking a subclass here - the Evoker is pretty powerful, but also fairly restricted).

Here is our party:
20260315224528_1.jpg

20260315224530_1.jpg

20260315224531_1.jpg

20260315224532_1.jpg

20260315224534_1.jpg
Since we're now playing with a powerful custom group again and my last run through Deadfire has been pretty uneventful in terms of danger aside from spell reflections, I have decided that we also need some changes with the settings. The true culprit here is my routing: I have now worked out a route that basically results in me being overleved for 90% of combat encounters I take after chapter 1 is done. There are still some ship battles and bounties I tend to do at even levels, and those tend to be pretty fun, but even then, I will usually have very powerful gear at this point.

As a result, I am bringing back Only-Upwards Level Scaling, which I have played with once for my Triple Crown run (which also featured a custom party). It's been a while, so we will see if I can still deal with that. Aside from that, it's PotD, as per usual.
20260315215053_1.jpg
To recruit the party, Ifirn just completed the quest at the Inn and freeing Riggere, as level 2 was first needed. After that, the remaining Port Maje quests were dealt with peacefully, and we cleared out the sea cave. Next time, we will see how the party does at the digsite, and if level scaling will make much of an impact there.
 

Enuhal

Habitué
Messages
199
Ifirn, Ghost Heart Ranger, The Digsite

As is generally the case with a custom party, we are only at level 3 when venturing into the digsite. Our keys to success are Arba's Sporeling summons and Heliodan's Whispers of Treason. Those are assisted by Flint, who has picked up a club and the club modal, which heavily weakens enemy will defense, making it much easier to charm them. This is quite needed, because the adult boars are two levels above us and deal tons of damage with their gore ability - they need to be charmed. With charmed beasts, our herald and mostly the sporelings tanking, the others have ranged weapons at the ready to deal the required damage:
20260315233727_1.jpg

20260315233927_1.jpg
We approach the young drake group from the east, blow up the explosive barrel with pistols when 2-3 enemies are nearby and use a combination of Sporelings, Hold Beast, Whispers and Chill Fog to deal with the enemy while keeping Flint healed up with Lay on Hands. A few spells get empowered - and I notice while fighting that I forgot to rest with Captain's Banquets, but this turns out to be completely fine. I don't even end up using Arba's Charm Beasts - this goes to show that, with an optimized party and the right approach, even the upscaled version of this battle doesn't have to be super scary.
20260315234719_1.jpg

20260315235041_1.jpg

20260315235208_1.jpg

20260315235348_1.jpg
Note that we're waiting to clear out the Ancient Training Hall until we hit level 4, mostly because we don't have the best matchup against skeletons with this group, and upscaled spellcasters can get quite scary. So, we venture into the sub-arena level. Once again, Sporelings, various Charm spells, Hold Beast and Chill Fog (now combined with Combusting Wounds) are the key abilities to keep the dangerous paralyzing spiders at bay. As for Ifirn, the Ghost Heart ability to call in the pet and just send it in without any downside if needed makes for a nice distraction or additional damage source, even without investing any points into it. Happy to have picked the subclass:
20260316000138_1.jpg
For the final battle down there, we make sure everyone has some pistols equipped to counter the spirits and their veil-touched passive. The club modal allows us to charm even those, despite their high will defense, and Psion focus generation is so strong early on (and Whispers of Treason so cheap) that we can always try multiple times if we miss. The Adra Ooze is actually a triple red skull foe, meaning that it's more than 3 levels above us - The Shield Cracks (or rather, the lower level version) makes a first appearance to soften it up:
20260316001320_1.jpg

20260316001340_1.jpg
We exit the dungeon at level 4 and venture into the Ancient Training Hall - it turns out to be quite good that we waited for that one (and I plan to generally do this in the future, as it doesn't get you an extra level anyway), because, despite me keeping the enemy sorcerer mostly charmed, the skeletons are very tanky and our ways of dealing reliable damage to them are underdeveloped at this point (maybe we should've tried to pick up some scepters here, not even sure if they are available in Port Maje). We can really only take down the fighters once Constant Recovery runs out.
20260316002308_1.jpg

20260316002930_1.jpg
All right! We rest with Hylea's Boon on both our Watcher and our Wizard (who is responsible for Mechanics) - confirming to me that you can in fact use it on two characters at once. Since I basically never need it past the Neketaka/Deadlight/Dunnage stage (to which I plan to add Motare o Kozi this time around, as it's basically nonviolent with my approach and nets two items I really want for this party), I might as well boost mechanics as well since the wizard doesn't have a natural bonus to the skill anymore in the second game.

We sail to Neketaka. Now it's time for some serious questing. Since we have no official companions, levels will be a bit lower, as a) the non-watcher party members are always slightly behind and b) we miss out on the free extra experience from the many relatively easy & early companion quests. This shouldn't be a big deal though - once we are at level 9, which we should get after the mostly non-violent part of the questing (outside of Neketaka random encounters and the Dunnage street battle), the party should be at full strength, with Heliodan getting access to level 3+4 buffs and debuffs (the most important levels, really), Arba having both Form of the Delemgarn (FotD) and Plague of Insects (her key spells for the midgame), Saldor getting Ninagauth's Shadow Flame and enough other AoE spells to last for the vast majority of battles, and Flint getting the ogre summons. How Ifirn will hold up and contribute at this point remains to be seen.
 

Enuhal

Habitué
Messages
199
Ifirn, Ghost Heart Ranger, The Big Questing Route

As per usual, we do all Neketaka sidequests with a possible non-violent solution, so everything but the Old City quests,
the Hanging Sepulchers and A Glimpse Beyond. At level 8, when we're just about ready to leave for Fort Deadlight, we do get a random encounter - it's the rather rare Dyrwoodan Nobleman one, which I've never even gotten in my two previous runs. I was curious to see the result of the stealth dialogue choice of this, or so I assumed, generally non-violent encounter. Well, I failed the check (the DC must be quite high, considering the fact that we have Hylea's Bounty going), and it turns out that the result is a battle against his bodyguard, a battle I've never had to fight before. It turns out that our enemies are all 2 levels above us, which isn't too great, though luckily there are no spellcasters involved. We get through it with Puppet Master, Sporeling summons and various buffs/debuffs. It is, over all, not too difficult, as the enemy numbers are fairly low.
20260317013021_1.jpg

20260317013240_1.jpg

20260317013418_1.jpg

20260317014139_1.jpg
At the end of our time in the big city, we're able to afford Spearcaster, plus the various elemental materials to upgrade it for a mixed elemental lash, so
Aldare will have a decent weapon, as there's no good ranged weapon except for The Red Hand to gain via questing or stealing for now.

We deal with Benweth at Fort Deadlight, sail to Dunnage while avoiding any ship encounters, do the sidequests there as well and fight the street battle - it's quite easy this time around. We just have to make sure to keep the pistoleers crowd controlled/dominated, otherwise they could easily take down Arba, who is very vulnerable to firearms.
20260317120323_1.jpg

20260317120558_1.jpg
Now, we've added in Motare o Kozi to the quests to do while we still having Hylea's Bounty going - we also already have the Huana 3 reputation (thanks to turning in Arkemyr's tablet at the Huana palace instead of the RDC base), so we do not have to do a single fight here at all, as this allows us to get out of the beach encounter without any difficult checks. The Spine of Thicket Green is equipped, Aldare stealthes to the eastern and western tree, and for the most difficult one in the mid south-west, we approch from the north, prepare thief's putty and use one sparkcracker to distract the lion to the west of the tree. Combined with Edér's necklace and Boots of Stealth, even our measily two points in stealth are easily enough to get to and heal up the tree:
20260317123225_1.jpg

20260317123335_1.jpg
After getting past the RDC ship with our sleight of hand, our rewards, aside from more experience, are Nerian's Ward and the Blightheart Arquebus. The first one being one of the better defensive shields in the game (though the good upgrade sadly requires an Adra Ban), the second one being the weapon I want Saldor to use for this run. It's an arquebus, but it can be upgraded to gain a 10% corrosive lash that fully applies to spells, which is very useful, given the fact that Deadfire is somewhat lacking in good stat sticks for wizards. The other best ones are propably the Griffon's Blade and the Eye of Wael, as the Chromoprismatic Quarterstaff is locked behind extremely high level content which we won't do. Also, I think Blightheart should be quite easy to upgrade for a generalist wizard. We're now ready to start combat encounters and will head to the south next.[/spoiler]
 

Enuhal

Habitué
Messages
199
Ifirn, Ghost Heart Ranger, Southern Exploration and Return to Neketaka

For the first couple of ship and bounty battles, we make sure to upgrade Blightheart - the required dexterity afflictions are easily applied with Ninagauth's Shadowflame, since Paralyze is a dexterity affliction. After that, we switch into the skeleton wizard's grimoire from the digsite, which has Noxious Burst in it, for the Corrode damage requirement - and the final upgrades (kills with empowered spells) only require some big empowered shadowflames, though they requires us to rest a bit more than I would usually do.
20260317141815_1.jpg

20260317152204_1.jpg
We got quite a few of those kills in Woedica's Sanctum - the large groups of xaurips in the final level was very helpful in that regard:
20260317143414_1.jpg
The injury on Ifirn here was taken in an attempt to take down the wall in the dungeon with might - but even 18 doesn't seem to be enough. I should just always throw a grenade, I guess. Aside from that, everything went fairly well:
20260317144823_1.jpg
One thing I've previously noticed during the Thayn Goron triple crown run is that, with level scaling active, ship battles against enemies that make heavy use of guns, such as some Principi crews, can get quite dangerous, especially their opening salvo. This is one of the reasons I keep my party fairly well armored, especially our Ancient, Arba, who is extra weak to firearms. I had to cast withdraw on her one time, the other times her armor did the job - plus, she always starts combat by casting Form of the Delemgarn, which certainly helps against all the piercing damage.
20260317153421_1.jpg
We include the Sandswept Ruins in our southern tour of bounties, exploration and ship battles (especially since our wizard has perception 20 to skip the traps), and we return to Neketaka, buying the Singing Scimitar, Palm Sails and a few minor upgrades.

We also deal with A Glimpse Beyond, since I've gotten more comfortable with doing this quest earlier on - everyone but Flint equips a ranged weapon, and together with our summons, the Soul Collector is easily tanked (and also often paralyzed).
20260317174747_1.jpg

20260317175111_1.jpg
We also take down Lord Admiral Imp and Lady Epero. Now, the latter encounter is one of those were level scaling really, really affects the difficulty, because, just like the two other remaining bounties in this Dunnage quest chain, it is for some reason designed to ourlevel your party. Most enemies here are three levels bove us, Lady Epero and her war dogs are actually triple skull red foes (propably 4 levels above). As you can imagine, I was pretty scared going into that one, but there was no chance to retreat. With multiple high level enemies rushing into melee combat and spellcasters present, our party composition was tested and prevailed: With Zealous Endurance, and two defensive chants going, not to mention FotD, everyone is decently tanky, and if anyone is looking to get into trouble, Heliodan throws in a quick Pain Block. Both Sporelings and especially Ogre summons helped out quite a lot, with ogres keeping Lady Epero herself busy, while Ifirn, with the help of the passive on her Spearcaster arbalest, kept hitting and interrupting the enemy wizard - despite her damage output not quite comparing to Red Hand Maia, she is really good at shutting down spellcasters, even without the modal, which can always be activated for even more reliable interrupts.
20260317180024_1.jpg

20260317180751_1.jpg
In the end, we came out completely unscathed, which is very promising for the future of the run.[/spoiler]
 

Enuhal

Habitué
Messages
199
Ifirn, Ghost Heart Ranger, A few Encounters to the North and Eastern Exploration

After all that, we sail to Dunnage for more turn-ins and sail to the north, for an unusually early visit to Crookspur - there are two reasons for this - a) I discovered that it's not that difficult to avoid the slaver ships and land there even early on, if you have at least Palm Sails. b) Hiring the four star navigator here is very useful. c) I had enough money to pick up the Patinated Plate, and to get rid of the recovery penalty - this is the new armor for Arba, meant to cover her weakness with mass enemy gunfire. I decided to sail east from there to pick up a few bounties on the way and also landed in Sayuka to pick up a few items. Here, I learned that the druid/beast attack on the city triggers even if you're not on the RDC quest yet, which is very good to know. Luckily, the RDC guards are quite tanky and Arba is very good at dealing with beasts. Curiously enough, two of the bears here, for some unknown reason, are actually not coded to be beasts and don't read as valid targets for hold beast (I also tried to apply it anyway to see if it's just a visual bug, but no - they simply aren't beasts). In any case, with charm/hold beasts available, this was easy enough to do, though we didn't travel to face the druids yet:
20260317201352_1.jpg
So, we sail east and take on Radul, kill Onadere and make ur way south to the Death Guard Fanatic after resting with Captain's Banquets:
20260318002657_1.jpg
With the resting bonus at the ready, we also pick up Frosteeker, which I want to upgrade and compare to Spearcaster. After a few turn-ins in Neketaka, we sail east again for the remaining two exploration islands, avoiding Fyrgist in the process. The other ship bounties in the area are taken down, and we had no trouble here. These are some of the battles I've suffered injuries with when playing on fully upscaled settings before, but with my strong investmend in buyable legendary armor pieces, Zealous Endurance and FotD, our defenses are really strong. In Deadfire, buying already upgraded armor pieces is generally cheaper than upgrading weaker ones, plus, the materials for legendary upgrade for both weapons and armor are very limited - shields are an exception here, you can upgrade them to legendary all you want as all the materials are available from vendors who restock what they have. More turn-ins in Neketaka get us to level 13, and we plan to venture into the Old City next.
 

Enuhal

Habitué
Messages
199
Ifirn, Ghost Heart Ranger, Combat Quests in Neketaka

In the Old City, the level scaling is very noticeable - this group here is high level anyway, but even at level 13, one of them outlevels us by at least 4 levels:
20260319122814_1.jpg
Vessels are especially tough, and the big battle against the spawning rotghasts to the north takes forever to actually complete - imo the Old City is the worst area of the maingame, things just tend to get tedious down here.
20260319124817_1.jpg
The battle at the pool you have to dive in can get fairly dangerous (this is where Aldare's party received their only in-combat injuries, due to the spell reflect/biting winds interaction), and I recommend positioning the party quite a bit to the right, next to where an enemy wizard will spawn (allowing for an easy takedown) while the tank dives down and runs towards the party as combat starts. We are able to prevent all enemy spellcasters from actually using any offensive spells here (and those are starting to get high level - for example, delayed blast fireball was attempted by one of our foes here).
20260319132553_1.jpg
Even if Frostseeker turns out to be worse than Spearcaster - which we will see - it is at least a very useful alternative weapon against pierce immune opponents due to its damage types.

The Giant Cave Grub, as a named enemy, can scale up to 6 levels above its original level, so it's propably level 17 here - at least 4+ above our party. However, we do have decent tools to deal with this enemy, as we're not lacking in interrupts and ranged damage. and it also doesn't have the best defenses. The battle turned out to be surprisingly easy given the level difference:
20260319133305_1.jpg

20260319133501_1.jpg

20260319134014_1.jpg
Katrenn, in contrast, is surrounded by constructs that all outlevel us to the extreme, because, as mentioned previously, this entire Dunnage bounty questline is somewhat strange with its levels - and while their damage output can't match our excellent defenses, it takes forever to take them down, as even the abilities we have to reduce their armor just have big trouble actually hitting them. Still, after several minutes of underpenetrating attacks, we eventually get our victory.
20260319135139_1.jpg

20260319140642_1.jpg
Down in the Hanging Sepulchers, things do look a little bit better - some very good positioning at chokepoints or bridges allows us to block of access to the party with Flint and our summons, now including some primordial oozes. In the southern crypt, we can actually just stealth out after picking up the tablet to avoid more pointless combat.
20260319142619_1.jpg

20260319143059_1.jpg
I am a bit surprised to see the ogre bounty at Dunnage outleveling us, as we go there for turn-ins, because I am doing that quest at its intended level. Well, since scaling is based on area level, not quest level, that's propably the reason. The system is sometimes very hard to understand. With good defensive positioning we are still able to get the victory here, even though Saldor gets into trouble a couple of times and we have to bail him out by paralyzing the foes attacking him. Next up, we will explore the northeastern and southwestern areas, plus do a lot more bounties.
 

Enuhal

Habitué
Messages
199
Ifirn, Ghost Heart Ranger, Exploring the North-East and South-West, plus all remaining Bounties

In the Northeast, we get a great gunpowder barrel explosion in the coal mine, helping us in getting an easy victory:
20260319171359_1.jpg
At this point, I decide that I want one additional level before taking on the battlemage lich, so we first explore the southeast - what's left of it, anyway. Note that, against the Eoten, who are weak to dexterity afflictions, the otherwise mediocre Thorny Roots, one of the ranger abilities I am testing out, turns into a full on AoE paralyze effect:
20260319174349_1.jpg
Though enemies like that are so rare that it doesn't really make the ability worth it. After clearing out Amira's Roost, we turn in the quest and go for another big ship hunt, taking out any named ships (except for the Deck of Many Things, of course) still left on the map - facing the Rathun is fun, as it allows any frost spells to really shine; Look at that Freezing Rake:
20260319192336_1.jpg
Since all that went fairly well, we decide to take on the final two bounties, Steel Preacher and Uamoru the Pretender - both quests are a level above us, but I was confident in our abilities, and that confidence was well placed:
20260319193408_1.jpg
Next is the battlemage lich. This enemy heavily relies on self-buffs, and we have Concussive Tranquilizer - we can just spam it with all our bond to take down those defenses:
20260319195441_1.jpg
By now, Ifirn has Twinned Shots, which is, aside from some specific wizard encounters where I want the Tranquilizer, now my go to to ability to spend bond - obviously the ability is not as great as it was in PoE1 because it's not a modal anymore, so the uses are limited, but one advantage of single class is that we do have a lot of bond (we're also wearing the DoC armor, so that's two more) and can fire quite a few of these off. I am mostly using spearcaster currently, but I am trying Frostseeker once again in Berkana's observatory for a comparison. I think Frostseeker is better against large groups of weaker enemies due to the AoE on crit - if that one happens, it can get very nasty with Twinned Shots and Driving Flight. Spearcaster, however, seems better for single target situations or against spellcasters. No trouble at Berkana's, you do not want to be a spellcaster such as Concelhaut when facing Ifirn right now:
20260320104639_1.jpg
Being to the north already, we also help out Furrante with Ori o Koiki, because we're siding with him for the endgame faction quest this time around, just to spread out our choices over several runs:
20260320123020_1.jpg
We actually find an adra ban in the sea cave beneath Crookspur, which is very good to know! I did not remember that there was one down there, and since I have often skipped the inland of Crookspur Island, I haven't checked the cave in a while. This allows me to upgrade Spearcaster to legendary (I decided to pick that one above Frosteeker, in the end). We have a huge bunch of turn-ins now, get all the way to level 18 and also go shopping for whatever we still might want around the Deadfire.

To note: Saldor, our wizard, has now overtaken Aldare in damage done (Aldare was in the lead for most of the game, though not by much) - not too surprising, as wizards get a bunch of really strong AoE options the later the game goes, single target just has a hard time keeping up unless it's Maia or some other fairly optimized rogue build. Aldare is still doing well though. Note that we are still at zero in combat injuries, which I am very proud of:
20260320125600_1.jpg
Next up, we are finally returning to the main- and faction questlines.
 

Enuhal

Habitué
Messages
199
Ifirn, Ghost Heart Ranger, Tons of Main- and Faction Quests

This is by far the latest I have ever gone to Hasongo/Poko Kohara - no good reason for the delays, I just wanted to try and do a bit of the side content at level. Scaling won't fully get those two areas up to snuff (it's capped at +6 levels for named enemies, +4 for generic ones), but that's fine. Hasongo turns out to be super easy - the scaling doesn't catch up to us. However, the opposite is true for Shadow under Neketaka: The scaling here goes HARD. I already remember it being one of the hardest parts of my first scaled run with Thayn Goron, and this time it was also the most difficult part of the run so far: This naga marauder was scaled up all the way to level 20! Saldor got knocked out here by just one weakening strike and a disengagement attack - this only happened because the god talk after Hasonog messed up the party formation, which is an incredibly annoying mechanic because I tend to not notice whenever it happens. Obviously, usually my Herald is at the front, and I intended to pull the enemies towards the group with him - however, I didn't notice that I instead selected Saldor, who took Flint's frontline position, and that put him in lethal danger:
20260321010956_1.jpg
Luckily, I have many options to resurrect party members by now, so Saldor gets back up. Khapa Tea was also absolutely crucial here, due to all the bog oozes. Still a tough battle. The quest did bring us to level 19 (the second battle is much easier, and we part peacefully from the dragon), so we get to use our ultimate abilities for Poko Kahara, Overgrowth, Ashen Maw and the Principi Finale.
20260321011315_1.jpg
In Poko Kohara, the Engwithan Titan is killed relatively easily - we now have a powerful bosskiller in empowered Missle Storm, though I do mess this up somewhat by thoughtlessly calling in some summoned weapons into the blast radius, which dilutes the damage. Still - easy enough, and the Greater Maelstrom takes care of the adds. Having both of these spells means that I don't even bother buffing up for a lot battles, as we can clear the battlefield with just one or two wizard and druid spells each, so it's not really worth the effort.
20260321155635_1.jpg

20260321155656_1.jpg
We quickly deal with the follow-up faction quests, Dirty Laundry and Overgrowth - no kraken fight, so no problem (scaling here doesn't seem to be troublesome, unlike Shadow under Neketaka, despite those being at the same quest level - I guess the area level is different?). Now, we only have the Ashen Maw, the final faction quest and Ukaizo left. Too bad we took that one injury in the Watershaper's Guild, I was kind of hoping that we could get a run with zero combat knockouts done.
 

Enuhal

Habitué
Messages
199
Ifirn, Ghost Heart Ranger, Endgame

Time to go to Ashen Maw - since I already ancountered some level 22 elder flame bats here, I decided not to fight the dragon - the legendary upgrade is not needed here, it would only affect the weapons of my casters at this point, which aren't too important. With no dragon fight, He Waits in Fire was very easy - now, for our endgame faction quest: The Principi questline, but on the side of Furrante. I have actually never killed Aeldys for him before - but it was very easy, Frostseeker did a hell of a job here
against large low level groups of enemies.:
20260322014305_1.jpg
Now, we have to take over the Fonferrus. This is one of my favorite parts of the entire game and a good reason to side with the Principi, who imo have a superior final questline compared to the other factions, especially when siding with Aeldys (though, for no-reload purposes, it is maybe the most dangerous path to pick - I think the RDC is actually the safest one). We make sure to level up and equip our extra party members one additional time. In this ultimate boarding battle, a lot of our crew are fighting along as well and can (and do!) suffer permadeath. Lucian Riva seems to be scaled to level 22, her fampyrs at 21. With empowered Great Maelstroms, Wilting Clouds, summoned weapons and the like, we still win the battle quite convincingly.
20260322015835_1.jpg

20260322020117_1.jpg
Before sailing to Ukaizo, we have to hire additional crew members for the Floating Hangman (what an adventure to sign on to - sail a legendary ghost ship directly into a deadly storm); The Engwithan Sentinels, upscaled, do quite a bit of damage - their attack speed can be surprisingly fast. They actually cause us to suffer our second in-combat injury, on Arba, who is especially vulnerable to vessels as an Ancient druid - but we can easily resurrect her and take them down with some armor reduction tech, such as "The Shield Cracks".
20260322021706_1.jpg
Our faction battle is the rare one again the VTC, which might only be the first or second time I've gotten that one (I think I've now seen all but the Huana in this position). Empowered high level AoE spells clear out the enemies within seconds, and we are able to finish the run. Nice!
20260322022206_1.jpg
You can clearly tell the difference with level scaling. It does seems somewhat uneven in its application - some encounters are strongly affected, others still feel quite easy. I think Shadow under Neketaka is the most seriously troublesome one, and the four Dunnage treasure map bounties are also very notable (outside of Lord Admiral Imp).

Our party did great, though I am, in retrospect, not quite as convinced of the single class ancient, and the multiclass cipher idea. Very strong in the early game, but they fall off quite a bit. If I could do Act I without whispers of treason and/or sporelings, these would be far less impressive.

Saldor, our unkitted wizard, was our damage leader in the end, overtaking Ifirn in the late midgame, though she still did very respectable work. In the end, I actually often times preferred frostseeker over spearcaster - honestly, the knockback on spearcaster can actually be a downside, it tends to push enemies out of the AoE of my casters spells. It is propably preferrable for a lot of single target enemies and spellcasters, but for everything else, especially tightly packed groups, frostseeker seemed preferrable. The dual damage type also helps A LOT!

For a while it looked like we could make this run without injuries - in the end we still ended up taking two, just like with Aldare - this time due to bad positioning with vulnerable spellcasters. A zero injury run certainly seems achieveable, though it's not something I am actively chasing after.

Now, how did Ifirn, as a single class ranger, do - was it worth it? Well, she did pretty well, but I can't help but feel that Maia with the Red Hand propably would've done even slightly better with the same job. Her damage output in the midgame was okay, became very strong in the lategame, but ended up being quite dependend on having Bond left in the tank for Twinned Shot. The final ability, Heart Seeker, was somewhat underwhelming, not easy to aim and unreliable with it hitting (not in regards to accuarcy, but projectile pathing). So, all in all, I think you get more bang for your back by playing a scout.

Looking at old saves with Maia in the party, she was the damage leader in all of them, even above characters like Aloth and Tekehu, which seems to support that idea. So, while Ghost Heart works very well for the ranged mostly single target high reliable damage role, it's propably still not as good as the classic Gunhawk/Rogue.

20260322124346_1.jpg
 

Enuhal

Habitué
Messages
199
A Chronicle of Failure

I have mostly shared my successful runs in this thread. Indeed, no-reloading through both PoE1 and Deadfire is a somewhat more reliable challenge compared to the Baldur's Gate series once you've figured out some working strategies and builds, because there's just less RNG and fewer instant death or long-term crowd control mechanics. A majority of my runs that make it past Act I do result in success. However, the Digsite can be a big hurdle - I've already alluded to that in my first PotD run and in my experiments before playing with Trisk, the Oracle.

Usually, I end up sharing runs only after getting past a lot of the big hurdles already, and thus, failures generally don't get posted because doing these write-ups takes some time, and when you know that they will result in an unsatisfying end, the motivation is often gone. However, I've decided to post a bit about my failures after what has, so far, propably been my best run, with Ifirn getting through upscaled PotD with only two total injuries. For most of these, I have zero screenshots, but there will be three runs, all ending at the Digsite, where I do have some.

First, a quick aside to talk about failure in PoE1: It is, indeed, quite rare for me these days - I have a lot more experience with the first game and had already played tons of PotD before ever trying to no-reload it. Despite Act 1 being a big hurdle there as well, I don't think I've ever actually ended a run there. The failures I can remember from the top of my hat are:
a) The Forgotten (doing them one or two levels too early is just not a good idea. Make sure you have Prayer against Bewilderment and level 4 spells in general - it might even be wise to wait until level 8)
b) The Adra Dragon (just don't do PoE1 dragon fights in no-reload runs unless you know 100% exactly what you're doing . It's not worth the risk, no matter how juicy these enchantment materials are)
c) Thaos (I think he ended two of my runs - I can't remember if both of these were upscaled, or one was upscaled, one was normal). It's generally his Cleansing Flame that can be a huge issue. Not too much ways to counter that one, aside maybe from very careful positioning, but that's hard to pull off early on in the encounter.

That's pretty much it. There were certainly tons of close encounters, but these are the only ones I can remember being actual run enders, and all of them have been quite a while ago.

Now, for Deadfire; There are a few more here:
a) Scripted Interactions. There are many of those that can kill the party outright, and I can remember three of them ending a run: 1) The Sandswept Ruins. Bring someone with Perception 20 or bring an Implosion Charge (easy to craft). Otherwise, either know exactly what you're doing or just don't go there. 2) The Whenura Cleft. A scripted interaction on the way to the Coal Mine to the north-east. You need someone with Athletics 14 here, which I once learned the hard way. Full party support and any item based boosts work here, so it's not that hard to achieve, you just need to know about it. 3) A Storm. Just don't sail into storms unless you got Lord Darryn's Voulge ready to upgrade. I've sailed in a couple of them in earlier runs, usually I got out of there without trouble, but once, I didn't and was quite surprised that the result was not just ship damage, but instant death.
b) Picking the wrong dialogue path in Family Pride. If you're doing this one early, like I usually do, and end up going down the wrong route in the final conversation with both families, the resulting combat is very likely to kill you, since these are high level encounters.
c) Messing up the infiltration path into Arkemyr's Manor. The robe won't work if you've fought the construct on the way to his private rooms. Just move up there immediately, and you won't run into it (on the way back, if you have the robe equipped, it's already neutral). I once died because I didn't know that, ran into the manor with the robe and got swarmed by enemies way above my level.
d) Shadow Under Neketaka. There's a reason I delay this quest, which essentially only consists of two battles (if you use the animancy route for the dragon), because I once did it fairly early on, since it is marked as a level 12 quest. It's gotten a lot better once I started using antidotes or Khapa Tea (now my favored method) to counter the bog oozes, but it's still often the most dangerous battle for many runs past the Digsite. Also, a special shoutout to the Engwithan Titan, who never ended a run for me, but very nearly did, forcing me to basically go for infinite kiting with Maia and Gouging Strike. I'm mainly mentioning that one because the quest level here (The Storms of Poko Kohara) is completely misleading, and unexperienced players will absolutely fall for that one, go there way too early and die - I think that quest level is propably the single most misleading piece of information in the game.
e) And, of course, the big one, the Engwithan Digsite. I've received game overs here in the Ancient Training Hall and during the first boar/wyrm battle, but the most dangerous one has to be the central young drake group. I don't think I've actually ever died to any of the encounters in the sub-arena level, but at least three of them are also notably dangerous. I would estimate that I've gone through around 15 deaths there, but a lot of them were in testing. Legitimate attempts after testing was done have resulted in 4 deaths. Three of them have been quite recent, played directly after I was done with Ifirn. Here's a short summary:

The idea was to go one step beyond both the Ifirn and the Trisk run. I've done "only official companions", so the digsite battles just with the Watcher, Edér and Xoti. I've done full only-upwards level scaling, but I've used custom groups both times, with Thayn Goron and Ifirn. Now, can we combine both and go for full only-upwards level scaling with only official companions/sidekicks? I thought I could, since Ifirn's run has been so successful, with only two injuries total - and, really, was my custom party that much more powerful than the official companions? Surely, with my experience by now I could also stop relying so much on cipher and druid powers for the digsite and play some new cool multiclass builds that I've never tried before, theorycrafted and brewed up while hiking. Right?
 

Enuhal

Habitué
Messages
199
Well... Here's how that went. This is Simia, a wood elf Devoted/Barbarian multiclass, using morning stars as his devoted weapon - there's a great one at Arkemyr's, and there are tons of synergies and equipment pieces that I thought would allow Simia to get to extremely low recovery despite wearing fairly decent armor, dealing strong single target and AoE damage with the weapon effect, carnage and a ton of great passives, while still being pretty tanky. Well... all that would require a few levels and items. With only Edér and Xoti on our side, the first battle at the digsite did start at level 4 - and the boars are scaled up to level 7. Not good:
20260322145617_1.jpg
Their gore ability just does SO much damage - Xoti was able to get rid of the big one with empowered Blessed Harvest, but things were not looking great:
20260322145752_1.jpg
Using all our activated abilities and potions, we are just about able to kill the other boars, but everyone gets knocked out in the process. Edér gets back up due to his unique armor, but he's not exactly healthy, and there's still a wurm attacking us. No abilities left, and Edér tries to run - but there's nowhere to go. Didn't even make it to the drake battle:
20260322150020_1.jpg

20260322150106_1.jpg

20260322150305_1.jpg
Okay, so maybe just three characters without any summons or charm options aren't enough for this challenge. Maybe we need at least some help, but I didn't want to resort to sporelings again. So, I brewed up this other idea in my head. What about a Shepherd - to be precise, a Stalker/Goldpact Knight multiclass? We're going to pick a bear pet, thus getting some big armor rating bonuses, also getting the passive abilities for the pet, and the paladin aura - so, we get two melee fighters who should be fairly tanky for the price of one without having to rely on summons. Yes, I knew, of course, that pets are much weaker in Deadfire compared to PoE1, but stacking all of these extra bonuses should make it work, right?
Well, the first battle did go according to plan. The pet wasn't exactly super tanky, but also not super squishy. Firun (the name of this Shepherd Watcher) and his friends after dealing with the boars and wyrms:
20260322163641_1.jpg
We sneak into position for the gunpowder approach against the middle group - we get a decent hit, but nothing dies right away, which is generally not a good sign:
20260322164512_1.jpg
And the battle completely deteriorates because we are lacking any significant abilities to deal with the drake at range, who just uses his breath attack from time to time to completely destroy us:
20260322164819_1.jpg
Okay, so... the number just don't work out for us here. Martial classes don't seem to have the toolset early on to offset the advantages our foes are getting with full level scaling in pretty much every respect. I am trying to see if this is even possible at all for me with my current knowledge and skillset. The upscaling does a lot more here early on than I would've expected. We give in and roll up an Oracle named Liska, basically a carbon copy of Trisk, an Ancient/Psion with 16/16/16 Dexterity, Perception and Intellect and everything else at 10. Bewildering Blows and Whispers, the well-established combination for early game encounters, does the job for the first battle:
20260322182412_1.jpg

20260322182839_1.jpg
Just to show how easy it would be to just skip the drake and sneak into the sub-arena level instead:
20260322183513_1.jpg
However, doing the spider battles and the adra ooze/spirit group without a fourth party member also seems super dangerous. Plus, I want to try and get this done.

The power of Charm Beast:
20260322183641_1.jpg
We get pretty much everything except for the drake. However, the beasts are not able to deal decisive damage to it quickly enough. Once we finally take it down, most of them are hostile again, leaving us still with a superior force against us:
20260322183922_1.jpg
We try to get back control of the battlefield with more Whispers and healing potions:
20260322183947_1.jpg
We almost get there - but the second boar knocks out Liska, the only one who has access to regenerating class resources. Edér is nearly dead, we're basically out of abilities. The final boar and two young panthers are still too strong:
20260322184329_1.jpg
Edér gets knocked out, and I try to reset combat with Xoti. She does run, she does get away:
20260322184501_1.jpg
But there's a problem. Knocked out party members only get up if they're out of sight of enemies, and Edér and Liska both got knocked out inside of the arena, where the beasts still roam - There's no way to get them back up without killing those first, and we can't leave the area unless the party is alive and together - Xoti tries to do it by herself, but she's just not powerful enough at this point (also, since I picked her up as a single class priest she can't get the Fast Runner ability, otherwise there might have been some hope with kiting). She dies, and a third attempt ends.

However, Liska came very, very close - definitely, the Oracle seems like it's once again the right call for raw early game power. And another try with another Oracle Watcher would finally do the trick. More on that tomorrow.
 
Top Bottom