Grim Face, Halfling (Hasty), Oblate - Acolyte, 5/18/10/12/10/20, Magic Deceiver (Living Deity, Wolf pet) fair Unfair. Part 3 (Chapter 1).
Well, it's been quite some time since our last report (I had a bit of side-track into the Baldur's Gate 3) but the Crew is still going strong. My main goal (or rather one of) during Chapter 1 was to check out once again if I'm able to clear all the Kenabres' areas/hit Level 5 before the attack on Defender's Heart and, as it turned out, it's indeed possible. I've met the Messenger right on the way to the last unexplored area (The Pitaxian Wine Cellar) and we where at level 5 already. We've bought the Bag of Holding, Small at the earliest opportunity so we always travel light. We also need to conserve our resources and minimize resting in order to succeed with this goal. It was also the first time ever when I got the 'Power Fist, the Gauntlet of Punching' from the Pink Eye (you need to fail the Diplomacy check during a conversaition with Indarah and I always build my characters with highest Persuasion possible). Those Fists naturally goes to Freya.
Then some shopping of scrolls: Resist Cold, Communal (x1), Protection from Cold, Communal (x1) for Shadow Demon; Resist/Protection from Fire, Communal (x2) for Brimorak and Tower of Estrod; Resist Electricity, Communal (x2), Protection from Electricity (x3) for Kinetisist and Tower of Estrod; Resist/Protection from Acid, Communal (x1) for Alchemist; Delay Poison, Communal (x3), Scroll of Barkskin (x10); Scroll of Invisibility (x3), Scroll of Winter’s Grasp (x3), Scroll of Haste (x2), Scroll of Mirror Image (x2), Scroll of Grease (x7);
Woljif’s quest: ~5 hours total (failed a second Intimidate check with Sister Kerismai so no Ring of Sharp Strike this time);
Market Square. Buffed all pets with Potions of Mage Armor and Scrolls of Barkskin + Protective Luck/Chant party-wide. Dealt with Dretches then Illusionist & Co.
Join Ember immediately (in the past, when I fiddled with exp sharing, I usualy joined her after the whole area was cleared) and her Slumber hex proved to be invaluable.
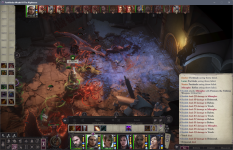
Then dealt with a big group nearby, Abrikandilu and Dretches, central area group
Next Hulrun’s task, Tieflings, Vermlek's group, some Ghouls, met Seelah’s friends and hit Level 4:
Level Up 4:
Grim Face,
Magic Deceiver (4), Cha+1; Nature's Whispers;
Freya, Bully (4), Int+1;
Seelah, Paladin (1)/SCM (1)/
Dual-Cursed Oracle (2), Cha+1;
Big Bird, Bully (4), Int+1;
Lann,
Zen Archer (3)/Sacred Huntsmaster (1), Wis+1; Zen Archery, Point-Blank Master (Longbow);
Doggy Doggerson, Bully (4), Int+1;
Camellia,
Spirit Hunter (4), Dex+1; Fortune;
Ember, Stigmatized Witch (3)/
Skald (Herald of the Horn) (1), Cha+1, Spell Focus [Enchantment]; Spells: Grease, Hideous Laughter;
Woljif, Eldrich Scoundrel (3)/
Drunken Master Monk (1), Dex+1; Improved Unarmed Strike, Dodge;
Now we can take a short breath and proceed further with clearing the rest of the Market Square. Before dealing with a big pack of Zombies/Shadows we added ~5 min of Fortune party-wide. And as a result had a cleanest fight with them so far - not a single hit got for any Crew members.
For
Necromancer we added Bless, Pro Evil for Big Bird, Divine Favor via scrolls for Lann and Seelah, Haste via scroll - and we prevailed! Only our pets were damaged/knocked out but none were killed.
Then a trio of Abrikandilus: multi Slumber and Trip make wonders. Rat Swarms fight was quite unexpected - we just moved into their line of sight from above and triggered the fight so 'had to take an opportunuty of that outcome'.
Went down the ramp and dealt with the first group of cultists there. We decided to stop there since our long duration buffs are about to expire and no spell slots available for casters. Time to meet Nenio (I'm going to build her as an Arcane Trickster, so 2 levels of Vivisectionist for sneak attacks and Infusion of Shield spell) and visit the Blackwing Library. Then back to the Defender's Heart for some talk and rest.
Tower of Estrod. Buffs: Protective Luck, scrolls of Protection from Fire, Communal/Resist Electricity, Communal, Delay Poison, Communal. Sleep/Ray of Sickening and Slumber sealed the deal. Faxon managed to cast Fireball (nullified by Protection from Fire) and Shocking Grasp on Doggy Doggerson (22 damage after Resist Electricity), one Deskari Cultist hurt Camellia for 4 hp and that’s it.
Arendae Party House. Buffs: Potions of Mage Armor x3 (for all pets), Barkskin spell (Doggy Doggerson, Big Bird), Protective Luck, scroll of Resist Fire Communal, Bless spell;
Gwerm’s Mansion. Buffs: Potions of Mage Armor and Scrolls of Barkskin for pets, Protective Luck.
Back to the Market Square to finish 'Starward Gaze' quest, Vermleks/Schir/Abrikandilu near Brimorak's house. Then into the house (Shield of Faith and Barkskin scroll for Freya, scrolls of Resist/Protection from Fire, Communal, Delay Poison, Communal, Bless). The fight there was a bit hectic due to pathfinding/targeting issues in small quarters but we prevailed nonetheless:
And now we are at
Level 5:
Grim Face,
Magic Deceiver (5);
Improved Initiative; Spells: lvl 1 (4/day), lvl 2 (2/day);
Freya, Bully (5); Improved Unarmed Strike;
Seelah, Paladin (1)/SCM (1)/
Dual-Cursed Oracle (3);
Exotic Weapon Proficiency - Fauchard;
Misfortune; Spells: Unbreakable Heart;
Big Bird, Bully (5); Improved Unarmed Strike;
Lann, Zen Archer (3)/
Sacred Huntsmaster (2);
Spell Penetration; Spells: Shield of Faith; Cunning Initiative;
Doggy Doggerson, Bully (5); Improved Unarmed Strike;
Camellia,
Spirit Hunter (5);
Shield Focus; Spells: level 3;
Ember, Stigmatized Witch (3)/Skald (Herald of the Horn) (1)/
Cross-Blooded Sorcerer (Fey/Undead) (1);
Extra Hex [Evil Eye]; Greater Spell Focus [Enchantment]; Spells: True Strike(1);
Nenio, ScrollSavant (3)/
Vivisectionist (2);
Accomplished Sneak Attacker;
Infusion; Spells:
Shield
I took Exotic Weapon Proficiency - Fauchard feat for Seelah and never regreted about that - now she crits left and right even vs sky-high AC foes (Fortune Hex helps here). And when that happens usualy they just die.
Now Nenio can cast Shield on Big Bird and while Resist/Protection from Fire was still active we dealt with some cultists near Temple of Desna and Rat Swarms in the house, where we first met Ember. Nenio is also quite effective with her sneak attacks on flat-footed enemies. What is left in the area for later are Shadow Demon, Conjurer & Co and hidden Babau. We took a second rest in the Temple of Desna.
Silken Thread Atelier. Scrolls of Resist Electricity, Communal and Protection from Electricity for Doggy Doggerson. Kervil saved vs Slumber and hurt Big Bird instead but we managed to manipulate him to target Doggy Doggerson and eventually he fell.
Topaz Solutions. Resist/Protection from Acid, Communal, Protective Luck, Mage Armor, Shield for Big Bird and Doggy Doggerson. Explosive Runes/Hideous Laughter+Evil Eye+Slumber - that's it.
Tirabade Residence. Rest outside (third rest). Protective Luck/Fortune party wide, Mage Armor/Shield for tanks, scroll of Align Weapon: Good for Lann; Sleep/Color Spray, Grease, Evil Eye, Slumber, Explosive Runes/Hideous Laoghter for Babaus/Entranced Fighters/Vermleks outside. All-In! Protection from Evil, Communal, Sickening Entanglement inside. Slumber + Coup de Grace. Also some Holy Water
Failed Ritual Site > Pitaxian Wine Cellar (met the Messenger along the way) > Defender's Heart.
Mage Armor scrolls for pets before starting the fight (inside the tavern) to save few rounds outside. Grease on the gate and the roof spawning point. The fight itself in turn-based mode is quite long and since Arsonists were able to throw their bombs few times we ended up with 10/12 tavern defenses but other than that it was pretty much under control.
Back to the Market Square to finish remaining foes.
Shadow Demon. Resist/Protection from Cold, Communal, Shield, Armor of Faith, Enlarge Person. Explosive Runes/Hideous Laughter, Incendiary Runes/Color Spray - done.
Conjurer & Co: Incendiary Runes/Color Spray, Evil Eye, Slumber - you know the thrill.
Back to the Defender’s Heart to rest and sell the loot and purchase Death Ward + Freedom of Movement scrolls for Nabasu. It tooks several tries and Nabasu has lot of immunities but suceptible to Slumber/Hideous Laughter. Web to have the Ghouls under control and even though they are immune to Hideous Laughter Explosive Runes hurt them quite a lot.
Next hidden Babau near the temple, some Abrikandilu nearby (Slumber+Coup de Grace). Then finish cleaning up Market Square (some more swarms and plagued horses).
And finally Pitaxian Wine Cellar. No issues there. Burning Entanglement, Grease - that's it.
On to the Gray Garrison!
Will continue in the next post (reached the limit of pictures/characters already).